While you might think you have to print out a document, physically sign it, scan it and send it back, thankfully there is an easier way. It's possible to sign PDFs directly from the Mail app so there's no need to waste any paper.
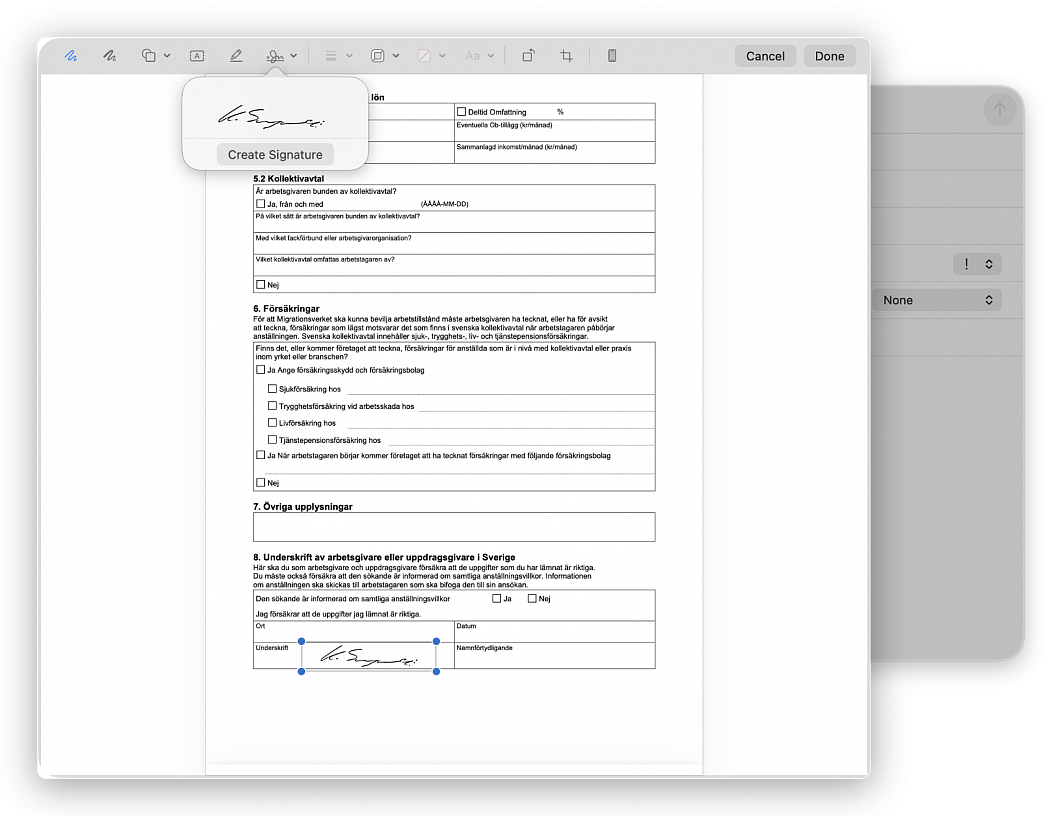
Drag the PDF you need to sign into a new email in Mail. Hover over it to see a small arrow button appear in the top right corner. From here, select Mark Up. The PDF will then open and you'll see a signature option at the top - it's the icon with a squiggle that looks like a signature with a cross to the left.
You can either select a signature you have used in the past, or you can create a new signature. If you choose to create a new signature, you can either use the trackpad on your Mac to draw one, your iPhone, or you can write your signature on a piece of paper and then hold it up to the webcam on your Mac.
This is particularly helpful if you use a third-party password manager or prefer managing your login credentials manually.
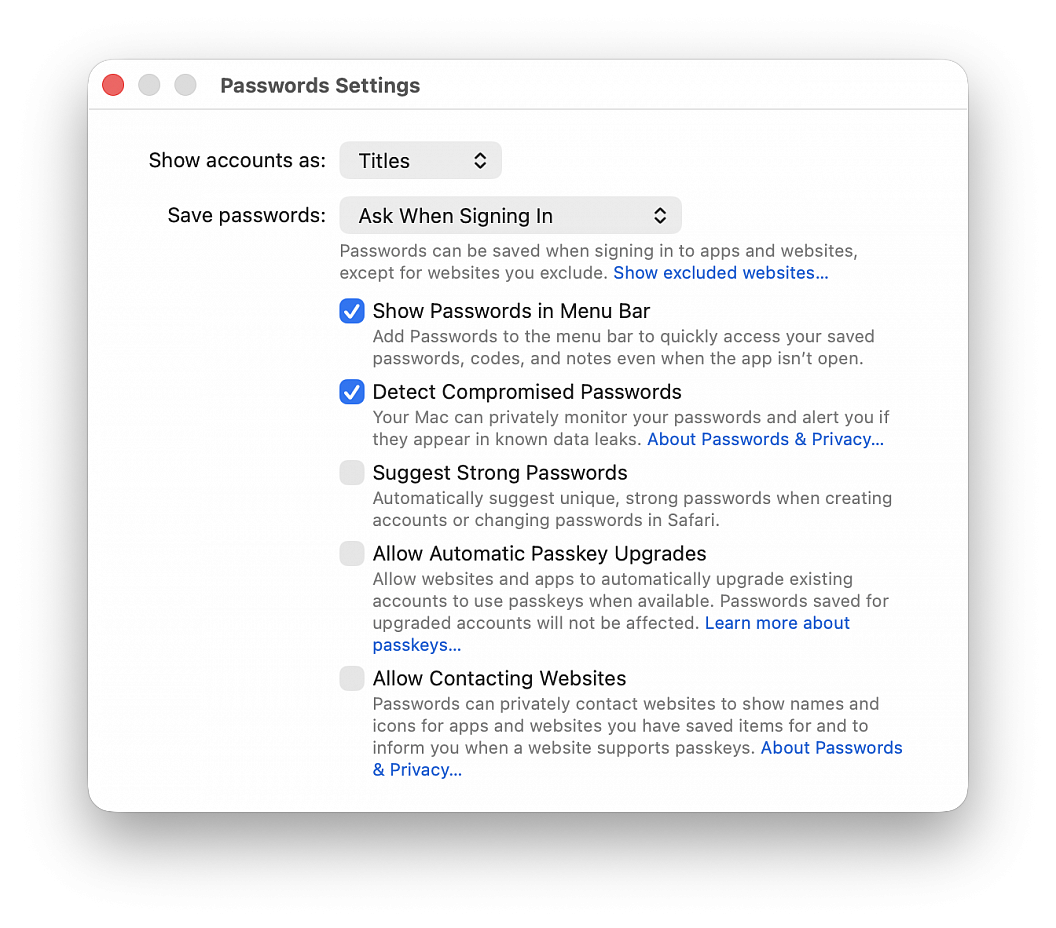
• Open the Passwords app
• Choose Passwords > Settings in the top menu bar, then authenticate with Touch ID or your computer password
• Uncheck Suggest Strong Password
You’ll no longer get suggestions in Safari to create a new password (and save it to the Passwords app) when you’re signing up for a new account on a website or changing the password of an existing website. But you should still see a tiny key icon in the password field, which you can click to generate a new password. If you don’t want to see even the tiny key icon in the password field to use the Passwords app, go to Safari settings > AutoFill and uncheck the box for "User names and passwords".
Many services use two-factor authentication nowadays, where your phone or email address gets sent a code that you must enter as part of the login process into an online service. These codes are one time use only and therefore don’t make a lot of sense to keep around forever, but manually going through and deleting all those verification codes from Messages and Mail can be annoying.
Apple has realized the endlessly piling up verification codes clutter is a hassle, and has created a handy optional feature that allows the operating system to automatically go through and delete those verification codes after they have been successfully used. This optional setting is particularly great when used in combination with the automatic security code fill feature available to macOS.
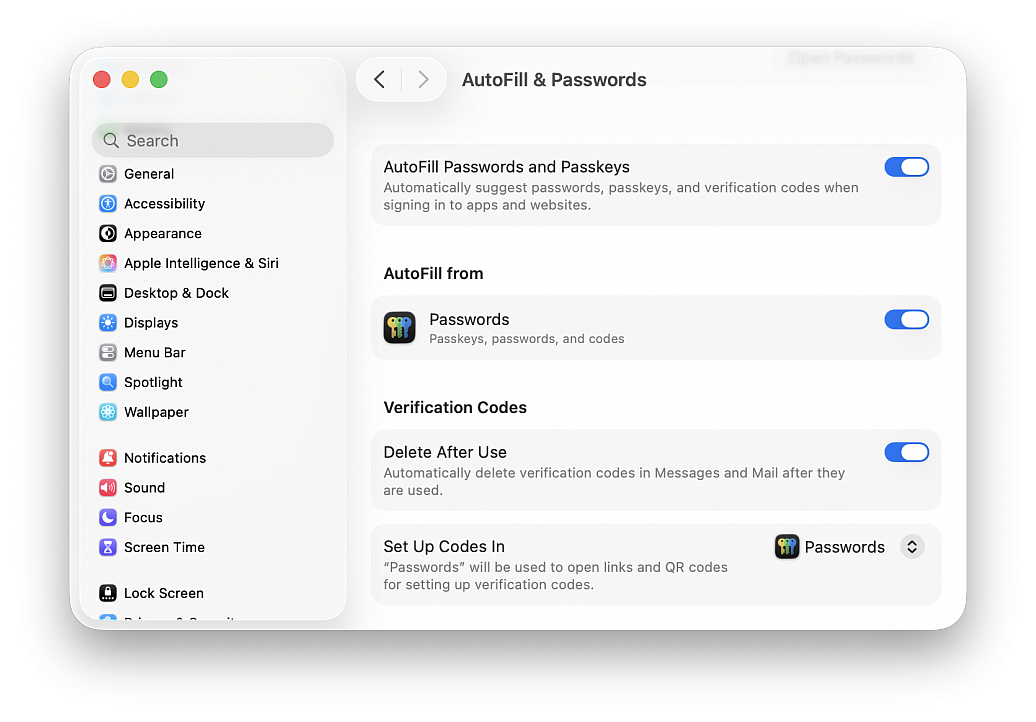
• From the Apple menu go to “System Settings...”
• Go to “General” and then choose “AutoFill and Passwords”
• Under the “Verification Codes” section, toggle the setting for “Delete After Use”
With this feature enabled on the Mac, your verification codes will now automatically be deleted after they have been used.
If you are going to sell, return, or give away a Mac, you almost certainly want to factory reset the computer first. Performing a factory reset on a Mac will erase all data on the Mac, and return it to a clean slate as if the computer were brand new, without any data or personal files on the computer at all.
Erasing a Mac and returning it to factory defaults has never been easier, thanks to the addition of a “Erase All Content & Settings” feature introduced in newer versions of macOS system software. Gone are the days where you had to manually erase and then reinstall system software, now you can simply let MacOS handle the task for you by choosing to erase and factory reset the Mac through a handy built-in feature.
The approach is available in macOS Ventura and newer only.
Be sure to back up the Mac with Time Machine first! Proceeding will erase all data, files, and information from the computer. This will erase all data on the Mac. Do not proceed unless you have backups of your data. Failure to backup will result in permanent data loss!
• Pull down the Apple menu and go to “System Settings...“
• Go to “General“
• Choose “Transfer or Reset”
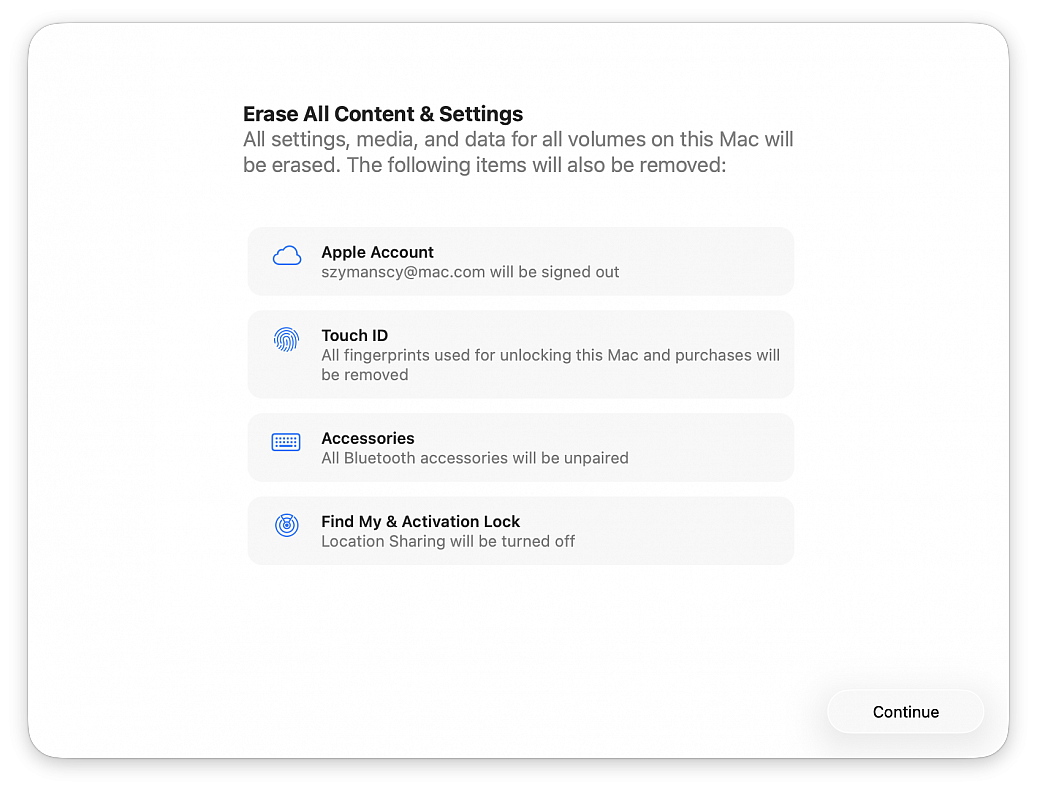
• Click on “Erase All Content and Settings”
• Confirm that you want to erase everything, log out of your Apple ID, and remove all data from the Mac by clicking “Continue”
• Follow the onscreen instructions to complete the process
When the Mac has finished factory resetting and erasing everything, a freshly installed version of the current version of macOS will boot into the typical “Hello” screen. Assuming you’re going to be gifting this Mac or selling it, you probably do not want to set it up yourself, instead let the recipient handle it.
This same factory reset feature also exists in macOS Monterey, but it is accessed slightly differently on those Macs. To factory reset a macOS Monterey Mac, go to the Apple menu > System Preferences > System Preferences menu > Erase All Content And Settings. Be sure to backup all data beforehand, as usual.
macOS Tahoe has killed Launchpad, but if you miss it, here are two alternatives to Launchpad that you can use to see Mac apps in one spot and open them quickly.
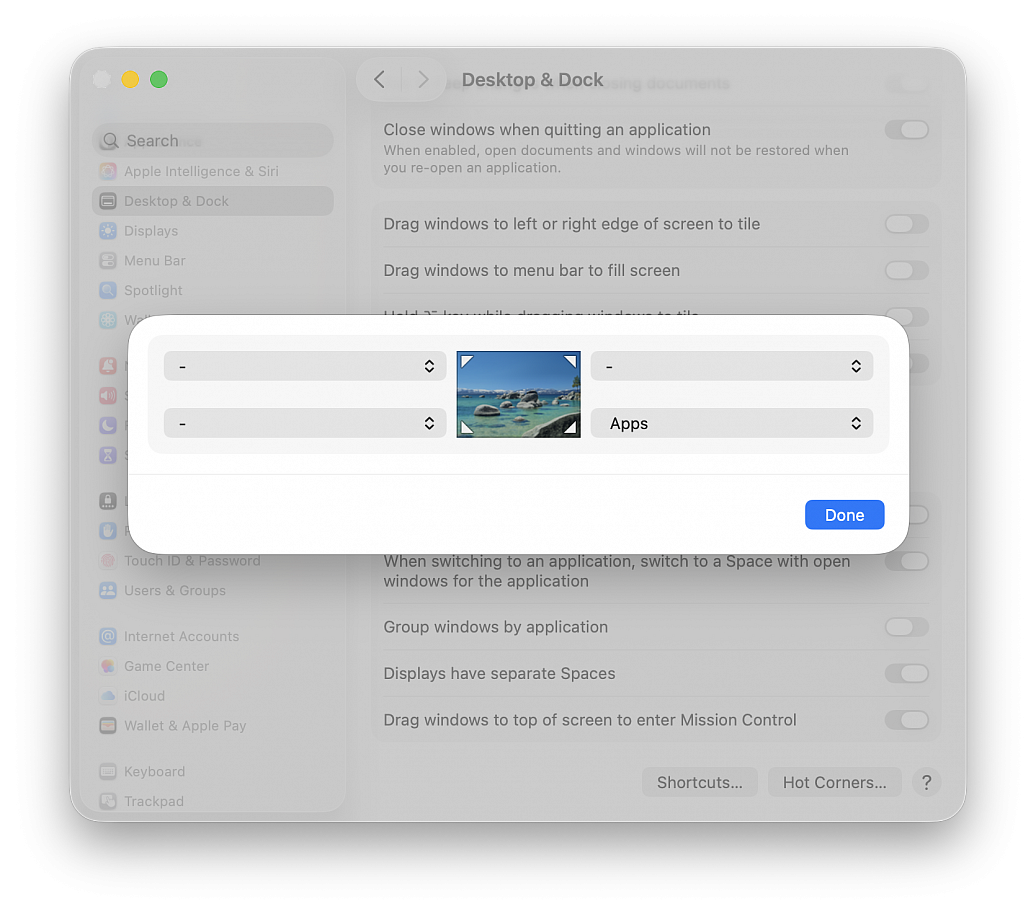
Add Apps to a Hot Corner. Setting up Hot Corners is very easy:
• Go to the Apple menu and choose "System Settings..."
• Click Desktop & Dock in the side column
• Click the Hot Corners... button at the bottom of the menu
• In the dialog that appears, click the chevrons to open the dropdown menu corresponding to the screen corner that you want to use and assign this corner to Apps, then click Done
• Now, you can open the new macOS Tahoe Applications overlay by taking the pointer to that corner of the screen
Add an Applications folder to the Dock:
• Open a Finder window
• Right-click over Applications in the sidebar and select Add to Dock
• An Applications shortcut will be added to the left of the Trash icon, click it to view all apps and open one (you can also right-click on this icon and change a few things)