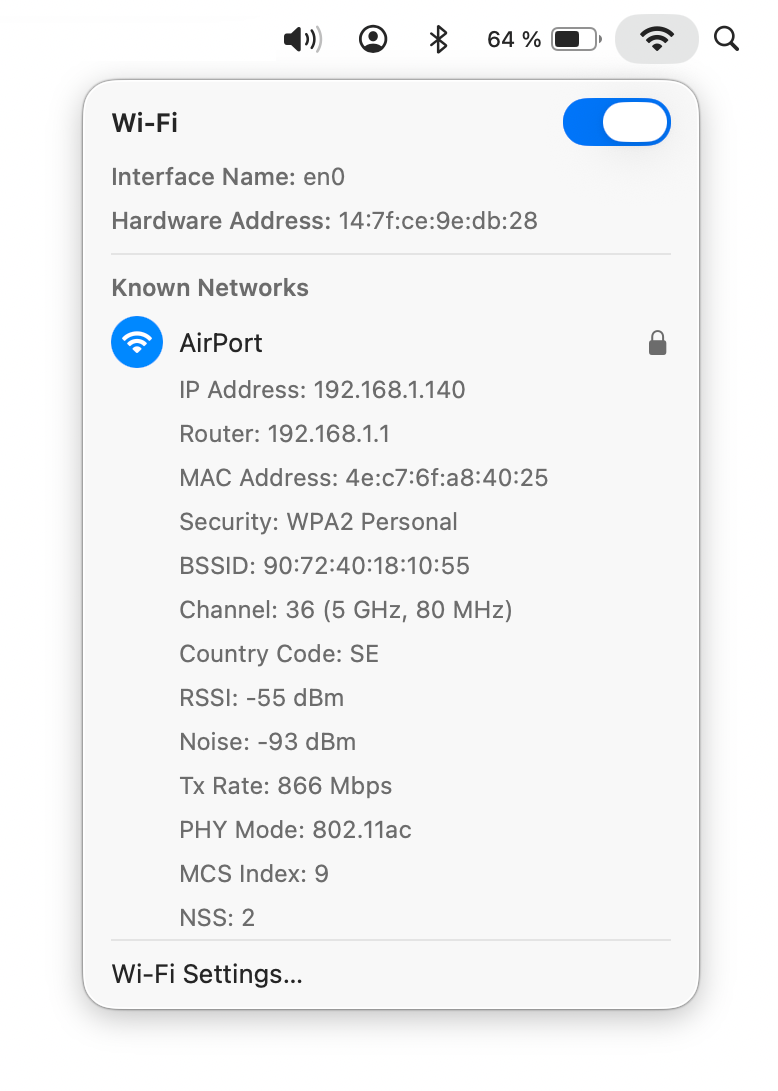
Did you know that you can quickly access information about your router, and check if your network is performing well? See your BSSID, signal-to-noise ratio, and even the transmit rate between your router and computer. All it takes is a press of a button and a click of your mouse/trackpad.
If you hold down the Option (alt) key and click the Wi-Fi icon in the menu bar, it will provide you with details about your router and the network you're using. The items in gray are all pieces of additional information seen only in this mode.
• IP Address: This is your computer's IP address.
• Router: Your router's IP address. You can type this into your browser to access your router's web interface.
• Security: Your router's security. Most routers on the market offer WPA2 Personal, and it keeps your network encrypted.
• BSSID: This is your router's MAC, or hardware address. It acts as an identifier for your router that lets it talk to other network-connected devices.
• Channel: This is your WLAN channel, and it determines which radio frequency the router uses to transmit information.
• RSSI: Received Signal Strength Indicator measures how well a device "hears" a signal from the router. It's useful for determining if you have enough signal to get a good wireless connection.
• Noise: This measures how much radio noise is interfering with the RSSI signal. Signal-to-noise ratio is a measure used in science and engineering that compares the level of a desired signal to the level of background noise. It is defined as the ratio of signal power to the noise power, often expressed in decibels.
• TX Rate: The transmit rate is the speed of the data that is transmitted between your router and your computer. Right now I have a speed of 450 Mbps.
• PHY Mode: This is the wireless protocol that the router uses, according to the IEEE 802.11 wireless standard.
• MCS Index: This number corresponds to the protocols uses to encode the radio signal.
Using symbol and text substitution, you can easily write any special character or symbol like ™ or ® just by typing something like TM or (r). You can adjust this and set your own, and it's very easy to configure.
• Open "System Settings..." from the Apple menu
• Go to "Keyboard"
• Click on the "Text Replacements..." button
• Adjust text to replace with a symbol or add more text to replace by hitting the plus (+) button
• Click "Done"
For example, if you set "JS" to be replaced with "John Smith", anytime you type JS and hit space the text will be replaced.

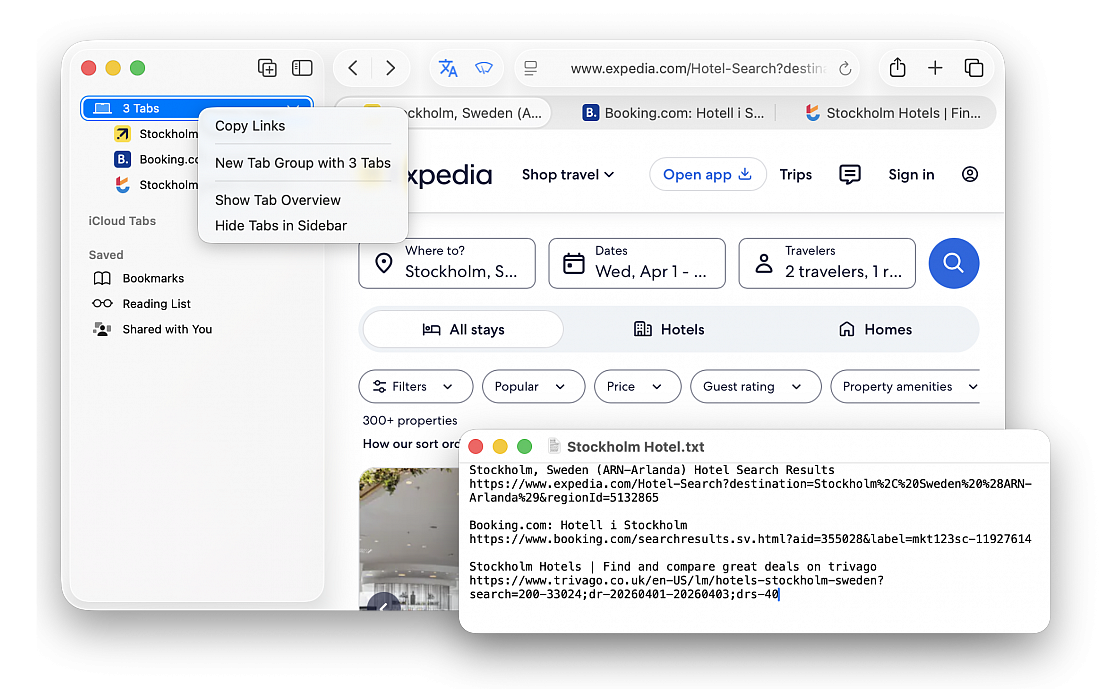
Whether you’re for example browsing Amazon and have opened a bunch of product tabs that you need to share via Messages or have several tabs open for your research work that you want to add to your document, you can simplify this process by copying all open website addresses in one go. As a result, you won’t have to manually copy each open link, paste it, and then repeat this process back and forth for the remaining tabs. A couple of clicks and all open URLs will be copied to your device’s clipboard for pasting into other apps.
• Make sure you have the relevant tabs open on Safari
• Click the sidebar icon in the top left corner of the window or press the Shift+Command+L to show the sidebar
• Right-click over the profile or Tab Group name and choose Copy Links, all URLs of open tabs will be copied to your Mac’s clipboard
Now go to Notes, Messages, Mail, Pages, Word, or another app, and paste the links there. When using Command+V to paste in an app that supports rich formatting, you’ll notice that the website name with the URL linked to it is pasted. But if you use Command+Option+Shift+V to paste without formatting, or paste them normally in an app like Messages, you’ll have both the website name and the full URL in plain text.
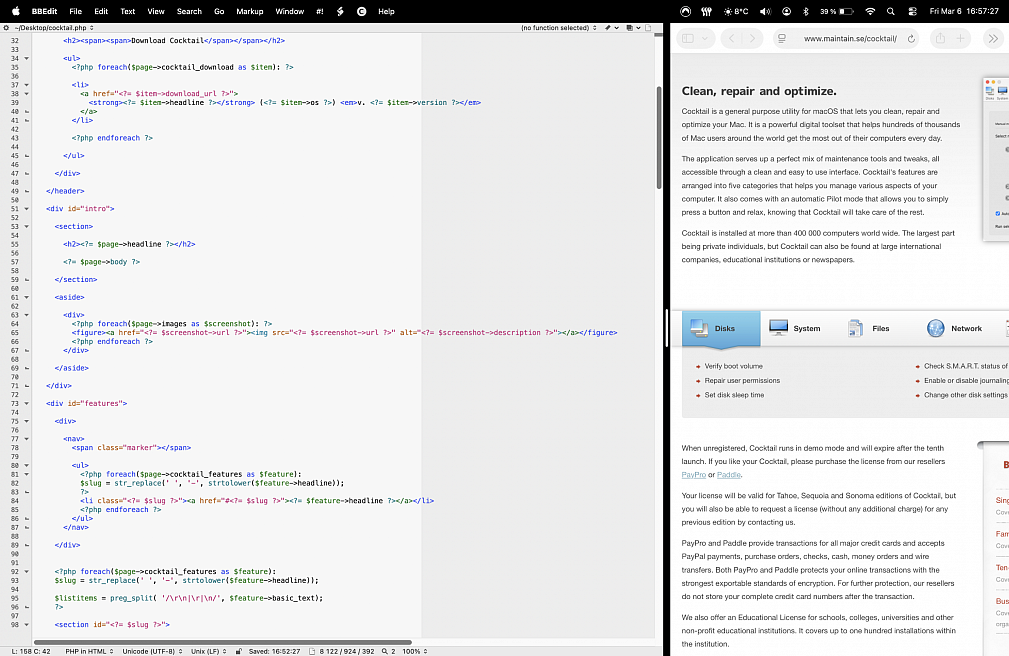
Split View is a useful feature in macOS that lets you split the screen between two different applications or windows, in complete full screen mode. Split View is appreciated by many users who find it to boost productivity and focus, particularly if they already enjoy and appreciate full screen app mode on the Mac.
Split View is accessed slightly different with macOS Tahoe, unlike the original implementation releases, you now have to go into a sub menu to access it:
• Open whatever applications or windows you want to use
• Click and hold on the Green button in the title bar to bring up the window options
• Go to "Full Screen" submenu and choose “Left of Screen” or “Right of Screen”
• The opposite panel will now open into Expose where you can select another open app or window to split the screen with in Full Screen mode
You can resize either the left or right split view panel using the slider button in the middle of the screen. To exit Split Screen Mode in full screen, simply pull the cursor to the top of the screen and access the Green buttons again, or press/hold the Escape key.
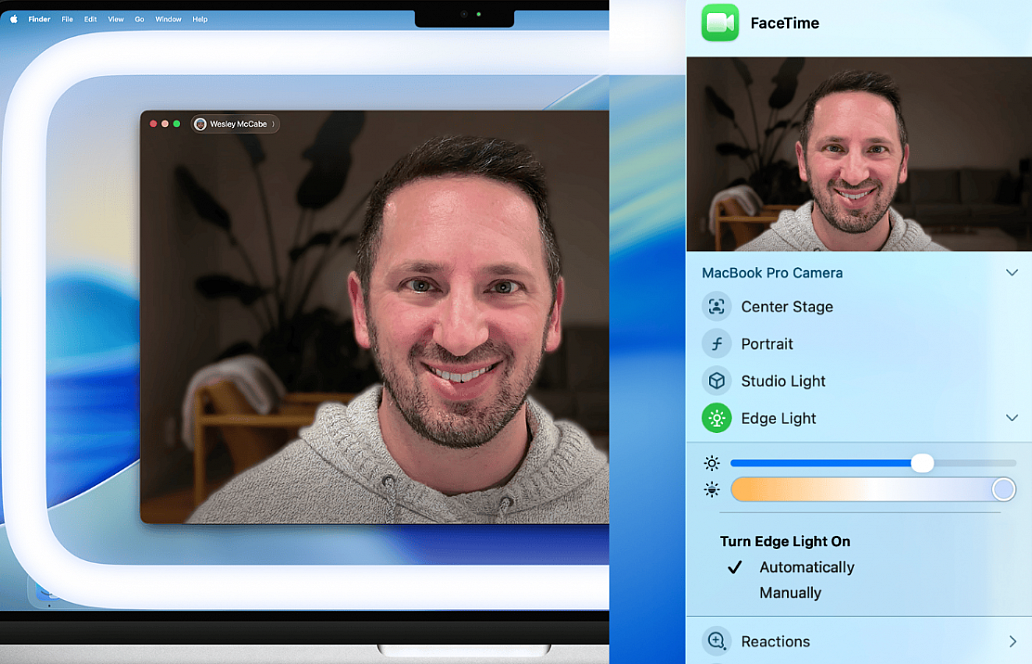
Unlike the iPhone’s front camera, the built-in webcam on Mac isn’t of very high quality. And things take a turn for the worse if you’re in a poorly lit room. To help address this problem, macOS 26.2 adds a handy Edge Light feature that transforms the computer display into a decently bright light source.
The Edge Light video effect provides a pleasing fill light to evenly illuminate your face in low-light conditions — like a virtual ring light. And to ensure that you always have access to your content, the effect automatically recedes from the area around your mouse pointer.
From the Video menu that appears in the menu bar when a video call is in progress, choose Edge Light to turn the effect on or off. If using your computer’s built-in camera, the effect appears on your built-in display. If using Continuity Camera (https://support.apple.com/en-us/102546) or other external camera, the effect appears on your primary display.
When Edge Light is turned on, click the arrow next to Edge Light in the menu to reveal additional controls:
• A brightness slider to adjust illumination by changing the width of the effect
• A color temperature slider to make the effect more or less warm. Warmer color temperatures show more yellow and less blue
• A setting to enable Edge Light to turn on automatically when you start a video call and the ambient light is low
Edge Light works best in low-light conditions, such as dim indoor lighting at night. You can combine it with any of the other effects.