Did you know that OS X lets you rename a file directly from the application it's opened within? This feature is supported in most bundled Apple applications, including TextEdit, Pages, Preview, and others.
• Hover over the title bar
• Click the filename to pull down a menu, enter the new name and hit the return key to save the files name change
The file extension remains consistent with the files format, and unlike renaming things in the Finder you can't accidentally change the file extension too. The usual method of renaming files through Finder is still around, but if you're saving files directly to iCloud this is likely the preferential method.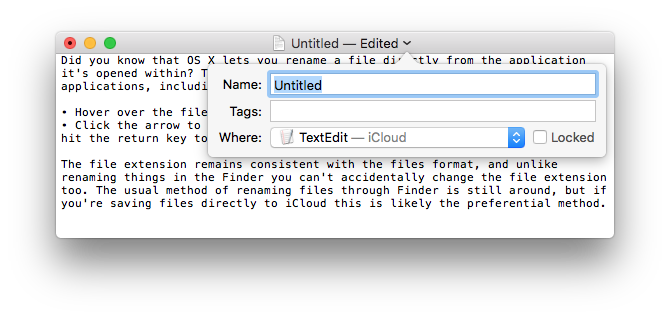
The first scrolls you all the way to the bottom of the page you're on; the second puts you at the top. So if you need to move in either direction, you don't have to actually scroll at all. For those of you who use Chrome or Firefox, this works in those programs, too.
This little shortcut is good to remember, as you can use it in other places around the Mac. In document-creation apps (like Pages or TextEdit), those shortcuts mean "jump to the beginning or the end of the text". So you don't have to scroll in those programs, either.
Finally, if you add Shift to those shortcuts, it means "select all the text between where my cursor is and the beginning/end". So if you place your cursor in the middle of a document (or select some text on a webpage), Shift-Command–Up Arrow will select everything between your cursor and the beginning of the document; Shift-Command–Down Arrow will select things between there and the end. We use this as an alternative to click-and-drag to select text, and it's more controlled than Select All.
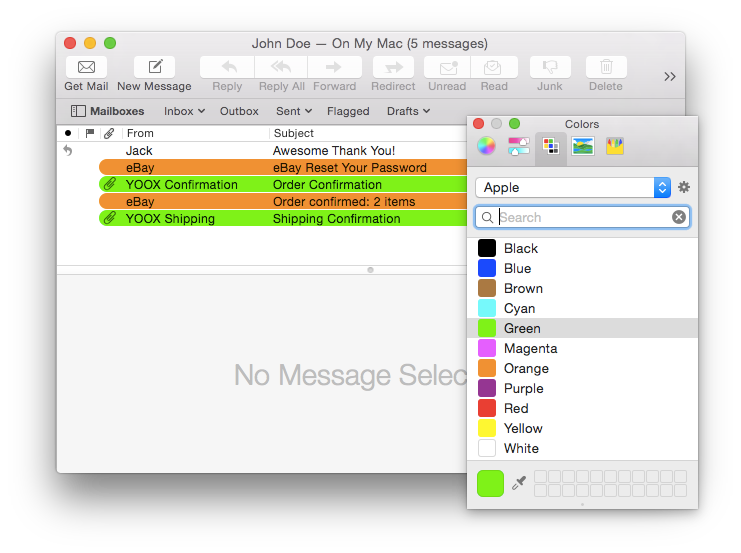
Although it's handy to be able to flag an important message in Mail, there is a more eye-catching method.
• Click to select a message
• Open the Colors window by pressing Command+Shift+C
• Choose your preferred color, and it will be applied to the message's background
To remove color applied to a message, choose white as a new color. You can set the background color of messages in rules (Mail > Preferences > Rules) as well.
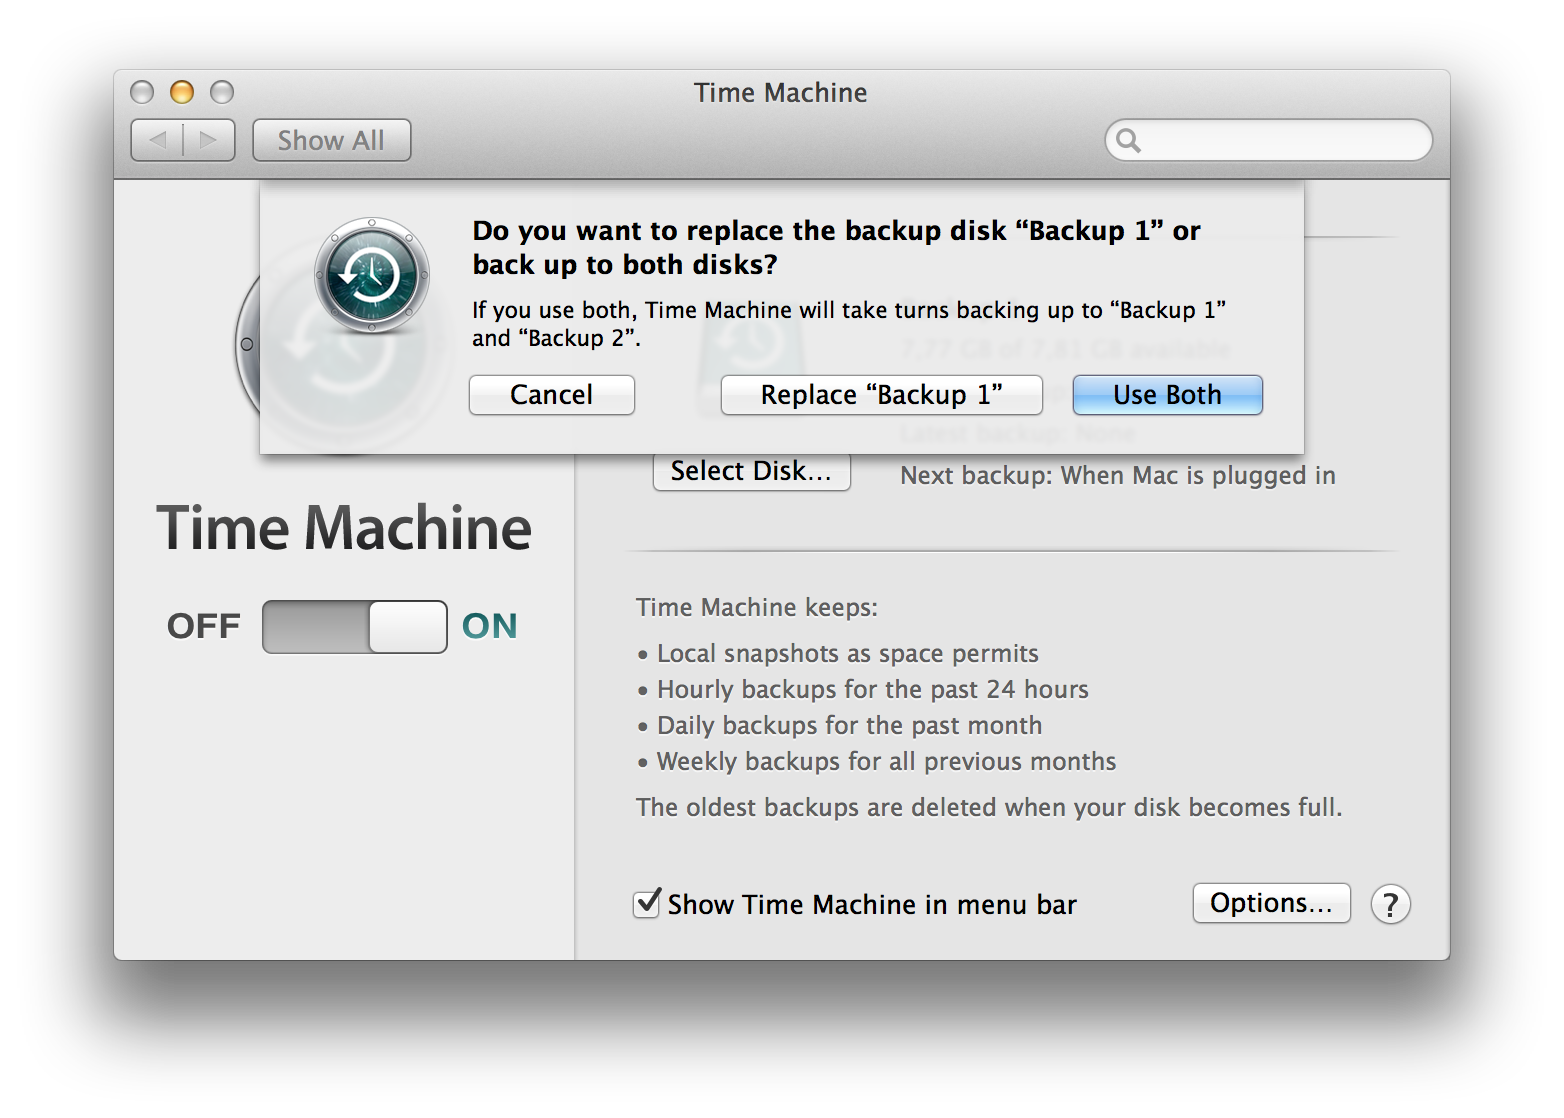
Despite constant encouragement these days to push our valuable data into "the cloud", there is still a genuine need for offline backups. Since its introduction in OS X Leopard, Apple has improved the Time Machine drastically. Within OS X Mavericks, Mac users can not only enjoy encryption and improved notification support but also backup disk rotation. This means that you can now choose multiple drives for Time Machine to use, and it's easy to set up!
To add extra drives to your Time Machine backup routine, do this:
• Open System Preferences from the Apple menu and click "Time Machine"
• Click "Select Disk..."
• Choose the volume you want to add to your backup routine, then click "Use Disk"
• Click "Use Both" to add the new drive to your backup schedule.
Your Mac will rotate its backup schedule to include all of the volumes you add to Time Machine, which is great because that means you can easily have separate backups at work and home simply by keeping different hard drives at each location. It's also great for automatically backing up to more than one Time Machine volume at the same location. For example, you can backup to a Time Capsule on your own network, and have a second backup on a hard drive connected directly to your Mac.
Time Machine will show you files from the volume it most recently used for backing up content. If you need to see files from a different backup location, just press the Option (Alt) key and choose "Browse Other Backup Disks..." from the Time Machine menu in the menu bar.
• Close unused document windows. If you’re not actively using an image file, close it. Each open file can take up a significant amount of memory, which can quickly lead to slow downs.
• Reduce an images resolution. Working with higher resolution images and files uses more resources. If you’re going to be saving a relatively low quality version of an image anyway, reduce the image resolution to a tolerable level to gain a nice speed boost.
• Purge history and clipboard. Edit > Purge > All. The history feature of Photoshop is useful but it takes up a lot of memory. If you’re not using it, purging the contents of history and clipboard frees up resources.
• Turn off animated zoom. Preferences > General > Animated Zoom > Uncheck.
• Turn off flick panning. Preferences > General > Enabled Flick Panning > Uncheck.
• Set drawing mode to Basic. Preferences > Performance > Graphics Processor Settings > Advanced Settings > Drawing Mode > Basic.
• Disable anti-aliasing on guides and paths. Preferences > Performance > Graphics Processor Settings > Advanced Settings > Anti-alias Guides and Paths > Uncheck.
• Adjust Photoshops memory use. Preferences > Performance > Memory Usage (adjust this based on your physical memory capacity and individual needs, a higher percentage is better).
• Turn off image previews. Preferences > File Handling > File Saving Options > Image Previews > Never Save.
• Use less Video RAM for 3D stuff. Preferences > 3D > Available VRAM for 3D > 30%, this is particularly useful for anyone using a computer with a video card that shares VRAM with primary RAM, such as some MacBook, MacBook Air, and Mac Mini models.
• Watch the efficiency indicator. At the bottom of any open Photoshop window you’ll see an “efficiency” gauge, if this falls below 100% that means you are using the scratch disk (hard drive) for memory and Photoshop will become slower. Solve this by allocating more RAM or by having less open windows.
Make sure you completely quit Photoshop and restart it and you should see a significant difference in performance.