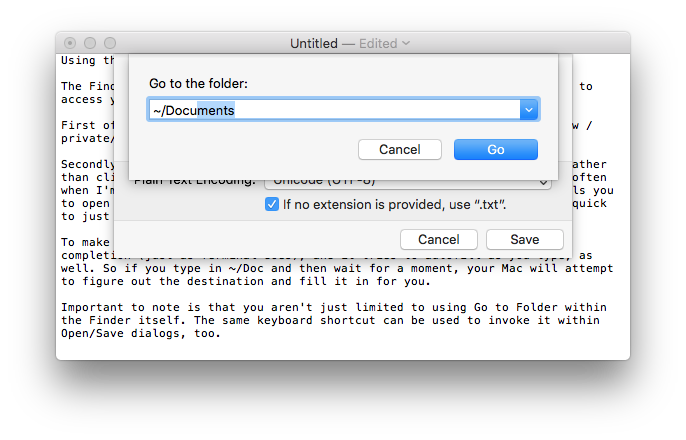
The Finder's Go > "Go to Folder..." (Shift-Command-G) menu item is a nifty way to access your file system.
First of all, you can use it to see hidden folders, so if you need to view /private/var, you don't have to open a Terminal window to do so.
Secondly, the "Go to Folder" window is an excellent place to paste a path rather than clicking around to get to a deeply nested folder. I use this pretty often when I'm troubleshooting. After all, if Apple's support documentation tells you to open ~/Library/Mail/V2/MailData to access a file within it, it's very quick to just copy that path and paste it into the window.
To make typing stuff in even faster, the "Go to Folder" window allows tab completion (just as Terminal does), and it tries to autofill as you type, as well. So if you type in ~/Doc and then wait for a moment, your Mac will attempt to figure out the destination and fill it in for you.
Important to note is that you aren't just limited to using "Go to Folder" within the Finder itself. The same keyboard shortcut can be used to invoke it within Open/Save dialogs, too.
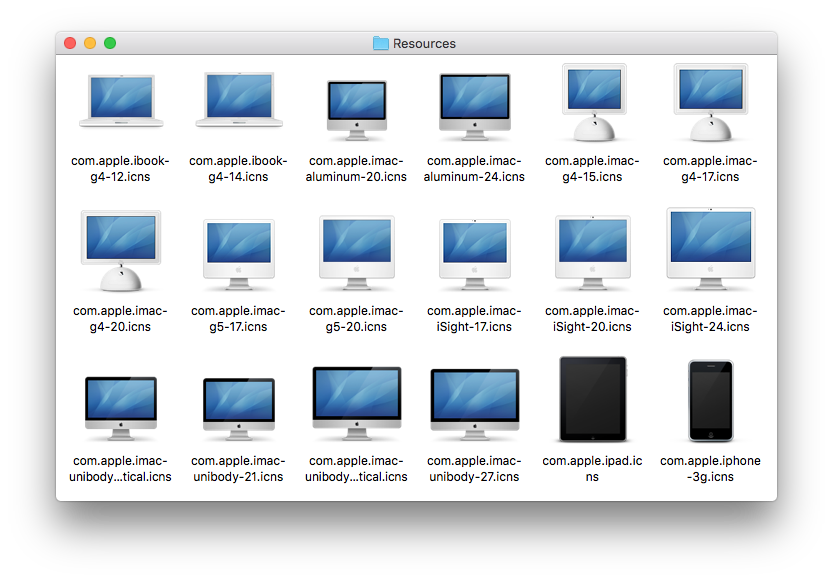
A large collection of high resolution Apple hardware icons is bundled right in macOS, including great icons for nearly all vaguely recent Mac models, iPad, iPhone, iPod, Apple TV, iMac, Mac Mini, Mac Pro, and much more, going all the way back to the G4 series.
To access the hidden hardware icon pack:
• From the Finder's Go menu choose "Go to Folder" and enter the following path:
/System/Library/CoreServices/CoreTypes.bundle/Contents/Resources/
• Scroll down until you start finding .icns files named “com.apple” followed by the hardware name
Many of these icons are what you find when using network sharing with a computer they match, but they also make for an excellent way to dress up your matching Mac, for example by replacing the generic Macintosh HD icon or anything else.
Many people equate productivity with screen size and assume it's difficult to get much work done on a small screen. Here are four ways to maximize productivity on small Mac laptop screens.
Hide inactive apps. Use Command+Option+H to hide all applications and windows except for the active app, also you can Option+Click out of a specific app to hide it as you begin working elsewhere. Hidden apps are easy to identify if you use Cocktail to enable transparent icons for hidden applications in the Dock (Interface > Dock).
Auto-hide the Dock. Hit Command+Option+D to enable auto-hiding of the Dock, summon it when needed by swiping to the bottom of the screen with the cursor. Dock is a great app launcher but keep it hidden when not in use.
Use full screen apps. Full screen apps help you stay focused and make the most of small screens. This feature was designed with Mac laptops in mind, so don’t forget to use it.
Use virtual desktops. Create new desktops through Mission Control by hovering over the right corner and clicking the + button. Use this with full screen apps to create a great desktop workflow that can be quickly swiped between.
In the old days you could reset a login password via a Mac's OS X installer disc. But with no such discs, what to do?
To reset a login password in OS X Mountain Lion or later, restart the Mac and hold down Command-R to boot into the Recovery HD partition. From the Utilities menu, choose Terminal to open it. In Terminal type:
resetpassword
and press Return.
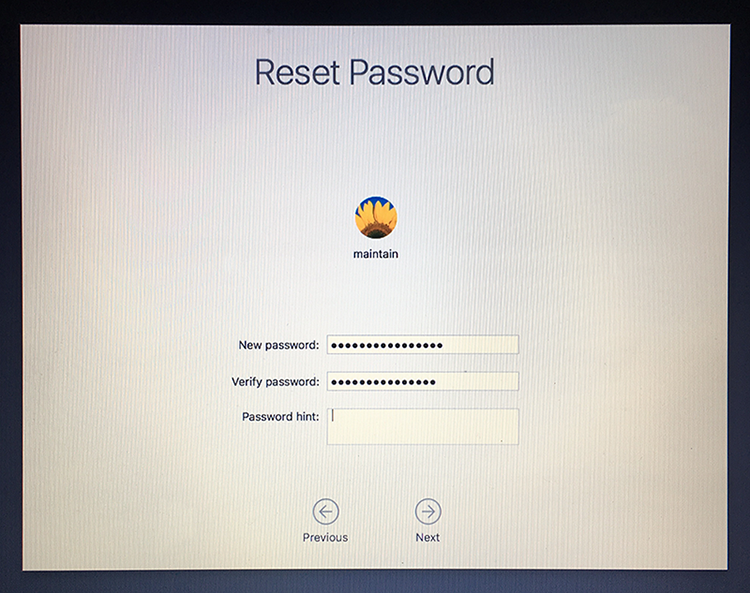
In macOS Sierra and macOS High Sierra, an Reset Password assistant will launch. Choose the user account or admin account you want to reset the password for. Enter a new password, confirm the new password, set (if you like) a password hint and then click on "Next" to set the new password for the account in question. Choose to "Restart" the Mac and when the Mac boots up, use the newly reset password to login to the computer.
In OS X Mountain Lion, OS X Mavericks, OS X Yosemite and OS X El Capitan, a Reset Password window will appear that will list all the bootable volumes attached to your Mac. Select the volume that contains the account you want to reset and choose the user name that needs its password reset. Enter and verify a new passwords in the appropriate fields and, if you like, enter a password hint. Click Save and the new password is applied to the account.
Windows has a program manager in the Control Panel that lets you uninstall applications, but you will not find a similar function on your Mac. So what's the best way to uninstall macOS apps?
In general, applications in macOS are packaged into a ".app" bundle that appears to be a single file but is actually a self-contained folder. Unlike Windows, in which an application usually installs a folder that contains the executable and supporting files, most of what an macOS app needs to run is stored within the .app bundle. Deleting an application bundle will remove that application's binary and all the supporting files contained within. Many apps, however, also install additional files in the user's Library folder, such as application preferences and caches.
To manually remove an macOS app, make sure the app is closed and head to the user's Library folder (in OS X Lion and above, hold down the Option key while selecting the Go menu from the Finder's menu bar and select Library). Here, you'll want to check for references to the application in the Application Support, Caches, LaunchAgents, and Preferences folders. Remove any files or folders that you are certain belong to the application you're trying to uninstall. You may also want to check the main Library folder by navigating to the top level of your hard drive and opening the /Library folder, although most applications will confine their files to the user-specific Library. Due to sandboxing requirements imposed by Apple, apps obtained from the Mac App Store are even easier to remove. Simply delete two items: the application file itself from the Applications folder and the application-specific folder in ~/Library/Containers (user's Library folder).
Another way to remove macOS apps is to use third-party tools. Take note, however, that automated tools can sometimes miss certain files or folders, and users employing these tools should always perform a manual check to ensure that all remnants of the application have indeed been removed. Finally, some applications (such as Cocktail) have their own uninstaller. Wherever possible, use the application-specific uninstaller for these applications.
Regardless of which method you choose, remember that leaving behind the occasional abandoned preference file is not likely to cause harm or performance issues. In general, removing the app bundle from the Applications folder and a file or two from the user's Library folder is enough to remove the application from the drive and free up disk space.