The Passwords app, Apple’s built-in password manager, not only stores your logins and passwords for easy authentication, but it can also alert you to security risks. Passwords app makes it easy to quickly find compromised, reused, or weak passwords, and take action to secure your accounts.
If you’re a Passwords app user and you haven’t investigated this on your own yet, it’s a worthwhile endeavor to do so. It makes it easy to determine if you should be changing a password that has been compromised without your knowledge (and that’s usually the case, since data breaches happen all the time and they can be hard to keep track of).
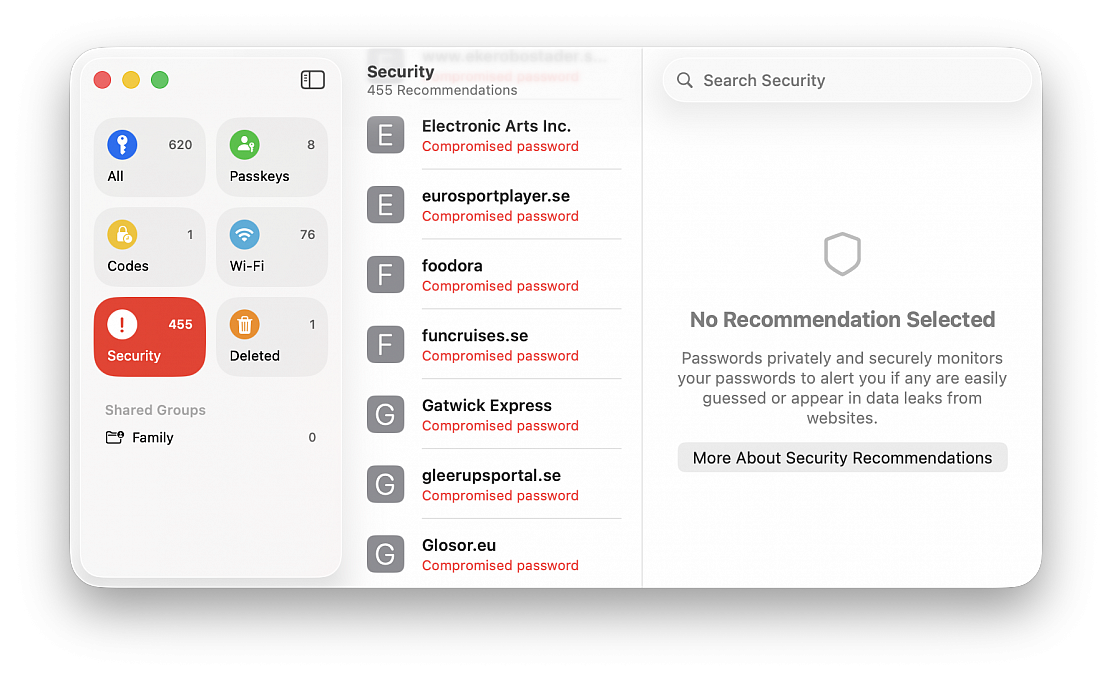
You can review password security warnings and compromises directly within the Passwords app on Mac:
• Hit Command+Spacebar to open Spotlight, type “Passwords” and hit return to launch Passwords app
• Authenticate within the passwords app as requested, with password or Touch ID
• Click on Security
The Passwords app categorizes issues to help you prioritize fixes into several categories:
Compromised Passwords
These passwords have appeared in known data breaches, and these are high priority for security. Since the password has been compromised, it should be changed immediately. This feature uses Apple’s integration with breach data sources, similar to services like Have I Been Pwned, to detect compromises from various sources. Many users who store the majority of their passwords in Passwords.app and iCloud will find results in the section, often for things like online retailers, that you may not have even known had a security breach.
Reused Passwords
This means the same password has been used across multiple accounts. Basically this poses a security risk because if one account is compromised, all others are now at risk since they use the same passwords. It’s best practices to use a unique password for each individual login and site, which is also why the random strong password generating feature of Passwords.app is so powerful, and useful.
Easily Guessed / Weak Passwords
These passwords are easy to guess, or don’t meet modern security standards. Any shorter or simpler basic passwords would qualify under this list, for example if you use the password “password123” for a password, it would probably appear as a weak and easily guessed password. Stronger passwords are longer and more complex with mixed characters. Any weak password should be replaced by a stronger alternative.
If you do see a problem to address, like a compromised password (or several, as is often the case), you can click on “Change Password” for the flagged account, and it will typically take you to the website whenever available, that you can update and change the password with that specific service. You’ll then want to save the new password with Passwords app, so that you can use it easily in the future, and so that Passwords app can check it for data breaches too.
With Passwords app, you can help to monitor security of your account credentials, and reduce your risk across multiple platforms. And because it’s built directly into macOS, iOS, and iPadOS, there’s no need for a third party app or service. This is a simple way to improve your account security and internet presence, and so it’s worth opening the Passwords app and taking a look at the Security section from time to time.
Your Mac is pretty safe on your private home network, but what about when you're surfing the Web in coffee shops? Anyone with a computer and rudimentary hacking skills could target you, which is why it's important to make sure your Mac's built-in firewall is enabled and that stealth mode is turned on.
macOS's firewall feature blocks unwanted network traffic coming into your computer, and stealth mode makes your Mac essentially invisible to hackers snooping for computers to target. They aren't foolproof features, but they will keep most people from finding and attacking your Mac on public networks.
First, you need to make sure your Mac's firewall is enabled:
• Open "System Settings..." from the Apple menu
• Go to "Network"
• Click "Firewall" and enable it
Next, enable stealth mode:
• Click "Options..."
• Scroll down and enable "Enable stealth mode" setting
• Click OK
"Automatically allow built-in software to receive incoming connections" and "Automatically allow downloaded signed software to receive incoming connections" should already be checked. Those settings let the apps you already have communicate through the firewall without you having to take any extra steps. Leave those checked unless you know what you're doing and plan to manage app network access manually. You should leave "Block all incoming connections" disabled, unless all you're doing is surfing the Web.

This is particularly helpful if you use a third-party password manager or prefer managing your login credentials manually.
• Open the Passwords app
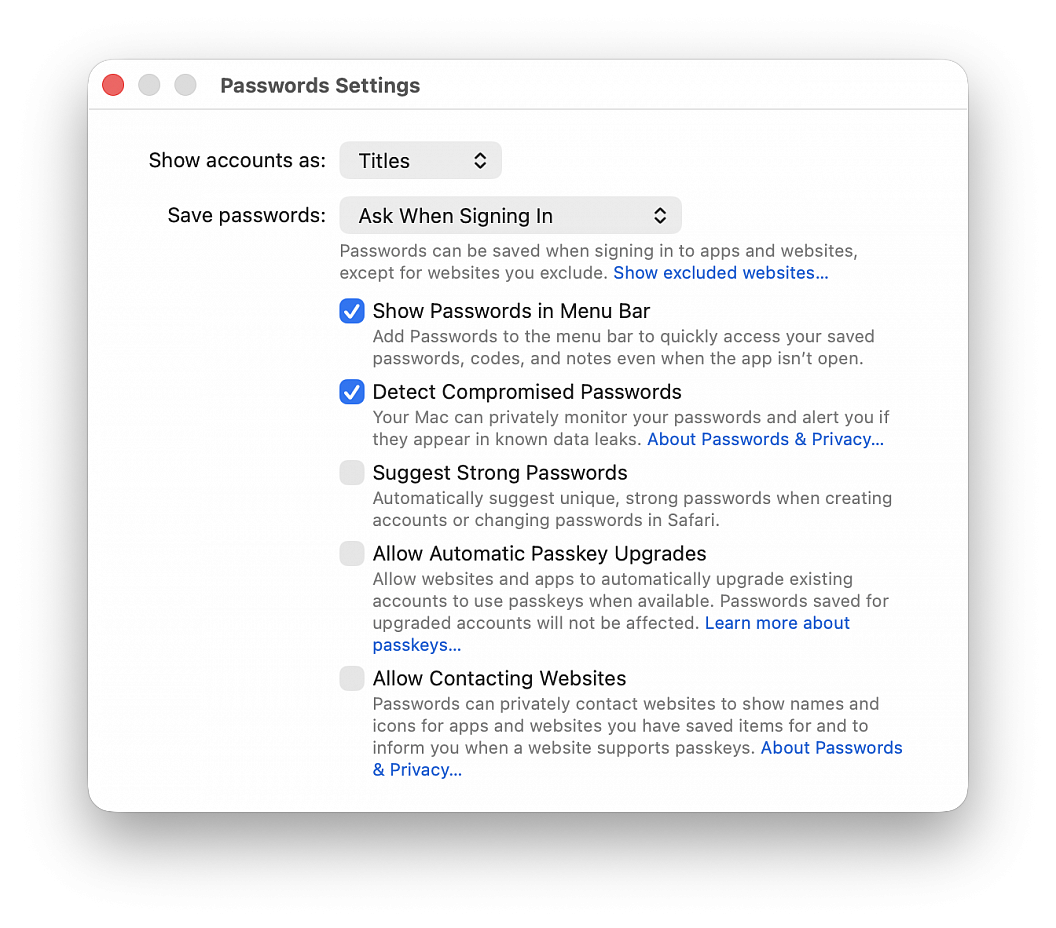
• Choose Passwords > Settings in the top menu bar, then authenticate with Touch ID or your computer password
• Uncheck Suggest Strong Password
You’ll no longer get suggestions in Safari to create a new password (and save it to the Passwords app) when you’re signing up for a new account on a website or changing the password of an existing website. But you should still see a tiny key icon in the password field, which you can click to generate a new password. If you don’t want to see even the tiny key icon in the password field to use the Passwords app, go to Safari settings > AutoFill and uncheck the box for "User names and passwords".
If you are going to sell, return, or give away a Mac, you almost certainly want to factory reset the computer first. Performing a factory reset on a Mac will erase all data on the Mac, and return it to a clean slate as if the computer were brand new, without any data or personal files on the computer at all.
Erasing a Mac and returning it to factory defaults has never been easier, thanks to the addition of a “Erase All Content & Settings” feature introduced in newer versions of macOS system software. Gone are the days where you had to manually erase and then reinstall system software, now you can simply let MacOS handle the task for you by choosing to erase and factory reset the Mac through a handy built-in feature.
The approach is available in macOS Ventura and newer only.
Be sure to back up the Mac with Time Machine first! Proceeding will erase all data, files, and information from the computer. This will erase all data on the Mac. Do not proceed unless you have backups of your data. Failure to backup will result in permanent data loss!
• Pull down the Apple menu and go to “System Settings...“
• Go to “General“
• Choose “Transfer or Reset”
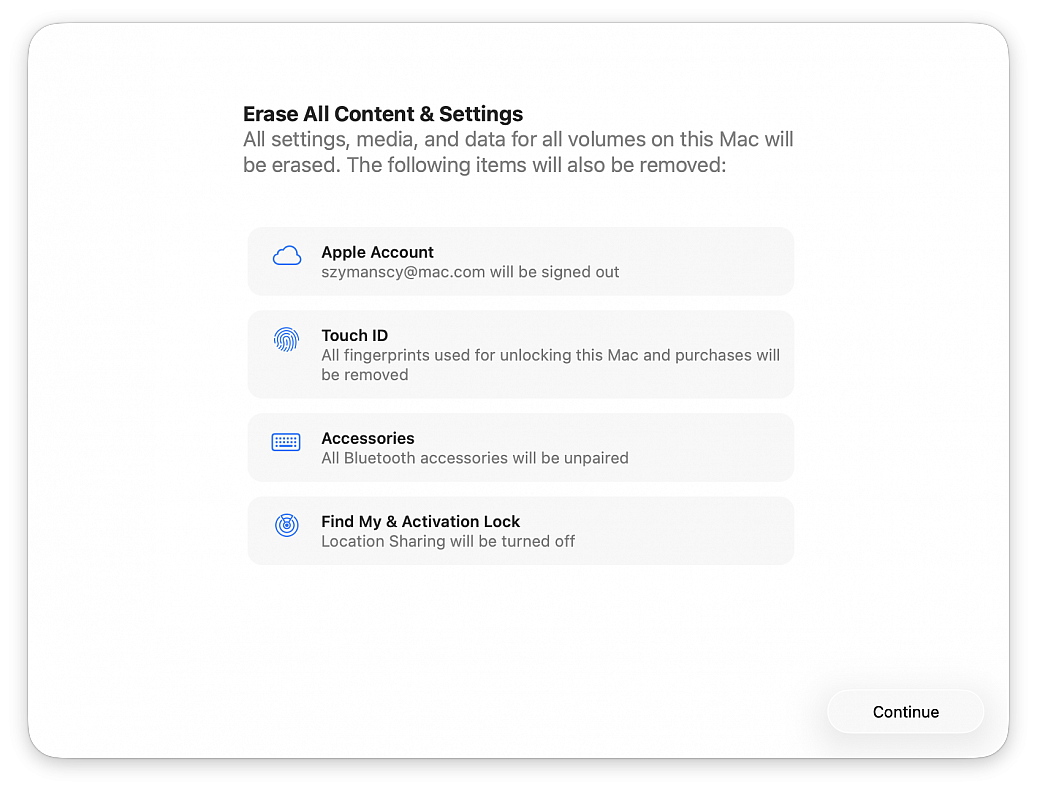
• Click on “Erase All Content and Settings”
• Confirm that you want to erase everything, log out of your Apple ID, and remove all data from the Mac by clicking “Continue”
• Follow the onscreen instructions to complete the process
When the Mac has finished factory resetting and erasing everything, a freshly installed version of the current version of macOS will boot into the typical “Hello” screen. Assuming you’re going to be gifting this Mac or selling it, you probably do not want to set it up yourself, instead let the recipient handle it.
This same factory reset feature also exists in macOS Monterey, but it is accessed slightly differently on those Macs. To factory reset a macOS Monterey Mac, go to the Apple menu > System Preferences > System Preferences menu > Erase All Content And Settings. Be sure to backup all data beforehand, as usual.
Images of tax, banking or wire transfer forms containing sensitive information can easily be viewed by anyone with physical or remote access to your machine. Unfortunately, macOS Preview doesn’t support file-level password protection, but there is a quick workaround that don't require third-party software.
By converting your graphics file to a PDF, you can unlock a handy password feature tucked away in its settings, turning your image into an encrypted password-protected PDF. This takes just a few seconds.
• Right-click the image you want to password protect, hover over “Open With,” and choose Preview
• Go to File > Export...
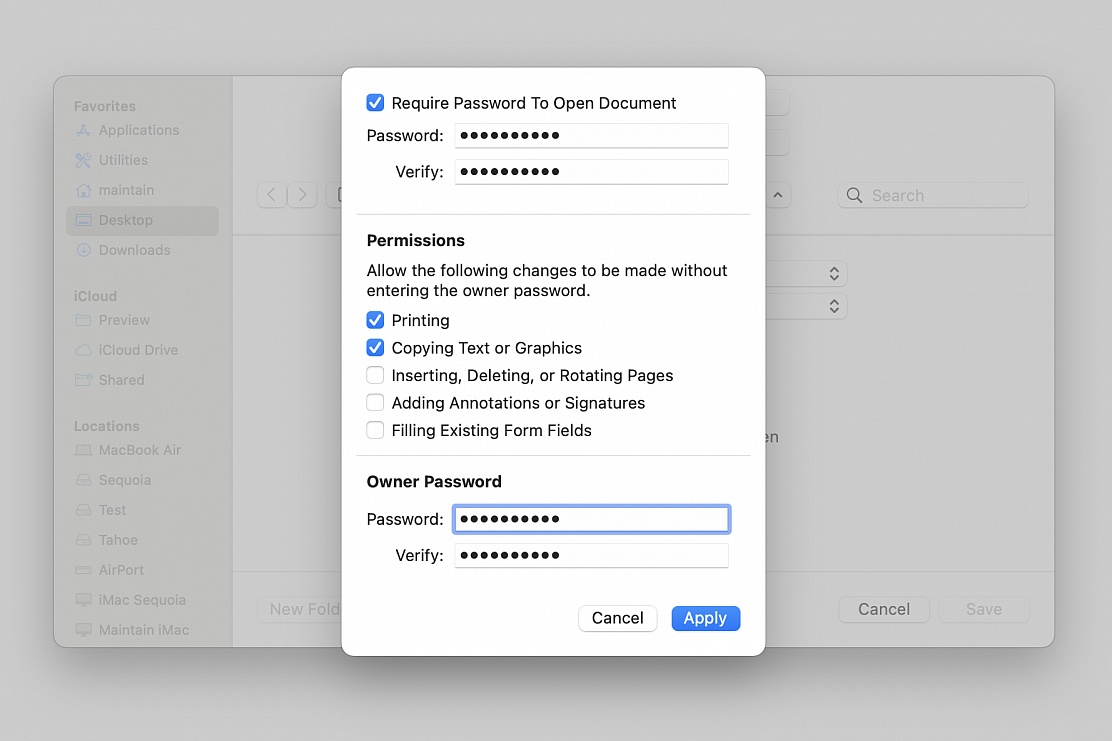
• Name your file, choose its location on your machine, choose PDF as format and click "Permissions..." to give you more options, including the one to add a password to the file
• Check the “Require Password To Open Document” box
• Enter the password
• Set permissions to allow actions and/or changes to be made without entering the "Owner Password"
• Enter the "Owner Password" required to allow any actions and/or changes not selected in the Permissions section
• Click on “Apply” and then click “Save”