If you've ever wished you could schedule the opening of a specific file, or set an application to launch on a specific date and time, either on a one off basis or on a recurring scheduled event, you can actually do both right in macOS with the help of none other than the default Calendar app.
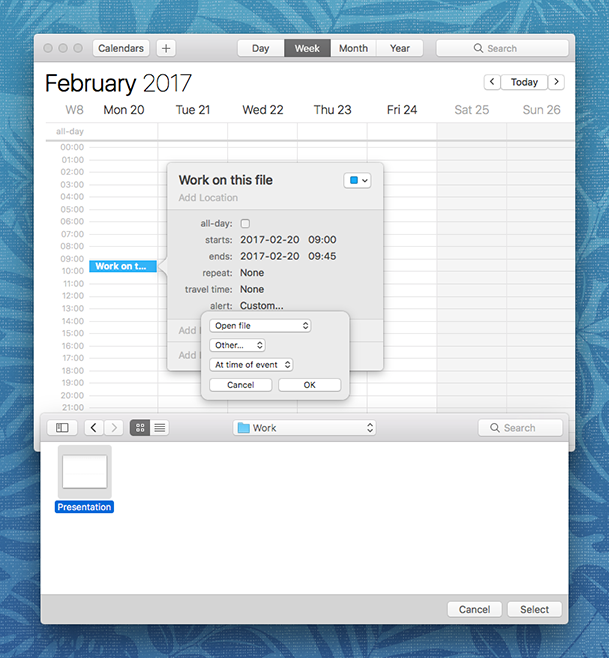
• Open Calendar in macOS and create a new event, either by clicking the [+] plus button or by double-clicking on any date
• Double-click the event to display event details
• Click on the date and time section
• Pull down the "alert" menu and choose "Custom…"
• Pull down the "Message" menu and choose "Open file"
• Directly under the menu, pull down the next menu and choose "Other...", then use the file browser to select the file you want to open on a schedule
• Choose "OK" when finished
Once the date arrives, the selected file will launch automatically in the default application at the date and time specified in Calendar as the alert. Use the “repeat" function to set the file to consistently relaunch on the given date and time provided. These can be standard, or custom repeating schedules like every last Friday of the month. The repeat feature is an excellent additional trick for repetitive tasks that use the same file, like a weekly or monthly earnings report, tax document, expense sheet, or whatever else requires regular use on a scheduled basis.
Entering "apple" in the location bar of Safari will yield you Google search results for those terms. However, including a trailing slash will cause Safari to add the ".com" to a logical location in the address, and take you to that URL. So, "apple/" will take you to "apple.com". Finally, if you type “apple/macbook”, Safari will go to "apple.com/macbook”.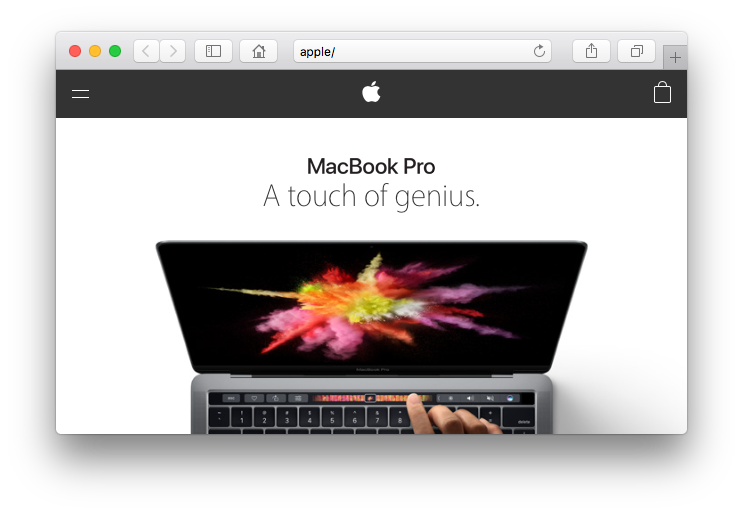
Despite the promise long ago of the paperless office, we still need to print documents from our Macs at times. The usual launch an app to print a document routine works fine for that, but you can save a little time by printing your files directly from the Finder.
Printing a document without first launching the app that created it is easy. Just select the document and use the Command-P keyboard shortcut (or go the the File menu and choose Print). The default app for the file's format will launch, and in most cases will send the document to your default printer without any interaction.
Applications that expect more user input before printing, like professional design apps, will wait for you to configure your print settings before putting ink on paper. It adds back in an extra step, but for file formats that default to Preview, it's as simple as select-and-print.
When you use the volume controls on a Mac to increase or decrease the sound coming from your speakers, those levels increment in whole steps on a scale from one to ten, press the up volume button once, for example, and the volume goes up one step out of ten. However…
If you hold down Shift and Option (Alt) before pressing the volume keys on your keyboard, you could adjust the volume in quarter-steps instead of whole ones. In addition to using this Shift and Option (Alt) combination to control the volume more finely, you can also use it when you adjust the brightness on your Mac. Press Shift and Option (Alt), then press one of the brightness keys on a Mac keyboard, and you'll notice that the brightness changes in quarter-steps. This is nice if you find your display is just a bit too bright or too dim.
When you get ready to sell or give away your Mac, there are some steps you should take. You'll want to back up your computer, disable some features and services, and erase the hard drive.
Moving to a new Mac? Learn how to move your files to your new Mac. Do this before you erase the hard drive or follow any other steps.
• Create a backup. Be sure you have an up-to-date backup of your important files and data. Learn how to back up your data in OS X.
• Sign out of iTunes. Open iTunes. From the menu bar at the top of your computer screen or at the top of the iTunes window, choose Account > Authorizations > Deauthorize This Computer. When prompted, enter your Apple ID and password. Then click Deauthorize. Learn more about deauthorizing your computer using iTunes, including how to deauthorize all the computers you've used with your iTunes account.
• Sign out of iCloud. If you use Find My Mac or other iCloud features on your Mac, you should first archive or make copies of your iCloud data. After that, choose Apple Menu > System Preferences, click iCloud, and then deselect the Find My Mac checkbox. Finally, sign out of iCloud. In System Preferences, click iCloud, and then click the Sign Out button. When you sign out of iCloud, you're asked whether you want to remove iCloud data from your Mac. Your iCloud data will remain on any other devices that are using the same Apple ID.
• Sign out of iMessage. If you're using OS X Mountain Lion or later, sign out of iMessage. In the Messages app, choose Preferences > Accounts. Select your iMessage account, then click Sign Out.
• Erase and reinstall OS X. To reformat your hard drive and reinstall OS X, follow these instructions. After you reformat your hard drive and reinstall OS X, the computer restarts to a Welcome screen and asks you to choose a country or region. If you want to leave the Mac in an out-of-box state, don't continue with the setup of your system. Instead, press Command-Q to shut down the Mac. When the new owner turns on the Mac, the Setup Assistant will guide them through the setup process.