Do Not Disturb mode is one of the best features you can use if you want to focus on a task, and not be distracted by the myriad endless notifications and alerts that pop up on the Mac. Enabling and disabling the feature with a keyboard shortcut offers a quick way to toggle the feature off or on as quick as possible and at any time.
To be able to toggle Do Not Disturb off or on by keyboard shortcut, you’ll need to enable a keyboard shortcut for it first. Here’s how to do that:
• Go to the Apple menu and select “System Preferences”
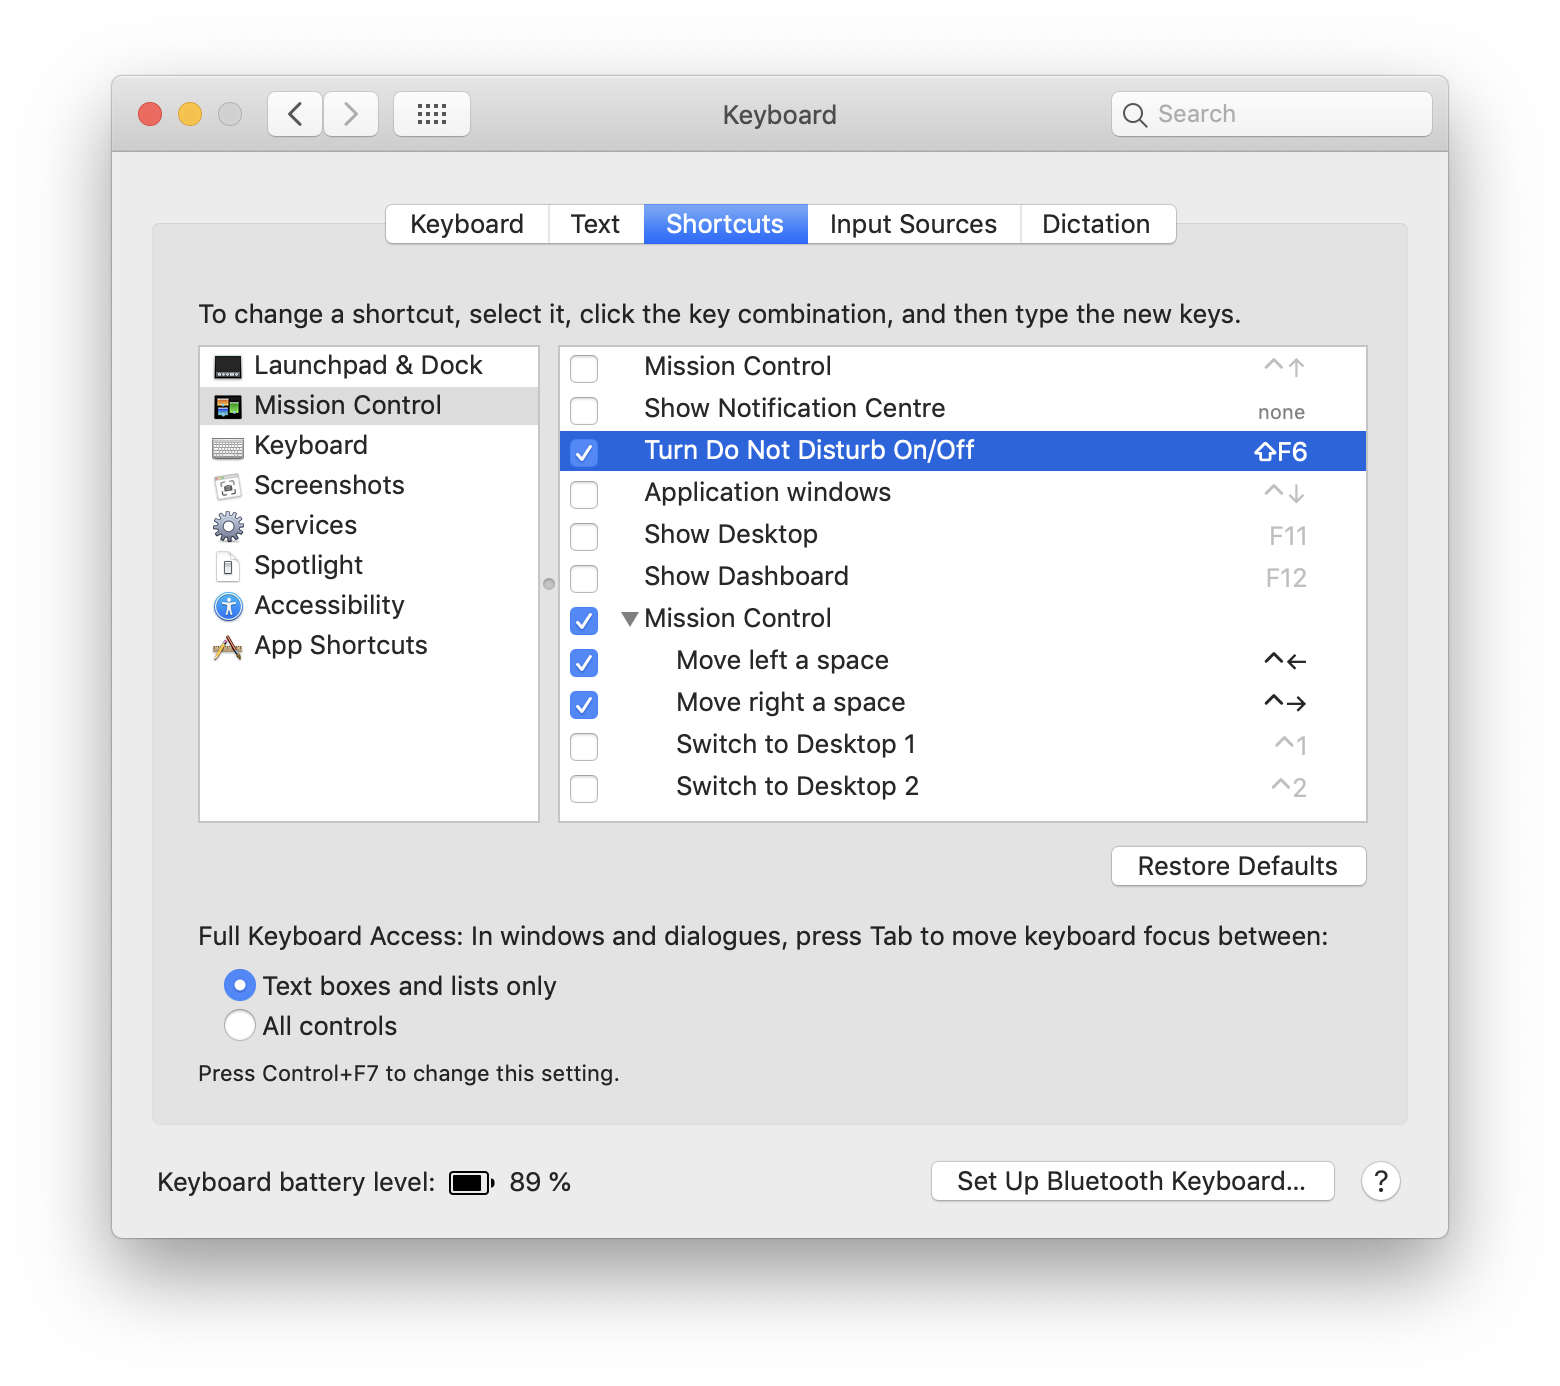
• Go to “Keyboard” and then choose the “Shortcuts” tab
• Select “Mission Control” from the Shortcuts options
• Locate “Turn Do Not Disturb On/Off” and make sure that is checked to be enabled
• Click directly to the right of “Turn Do Not Disturb On/Off” and then press a keyboard shortcut combination to set as the Do Not Disturb keyboard shortcut
In the example (see screenshot), the keystroke combination "Shift F6" was set as the keyboard shortcut for enabling and disabling Do Not Disturb mode. You can set any keyboard shortcut you want for this purpose, just make sure it’s unique and does not overlap with another keystroke combination or feature. Once the keyboard shortcut for toggling Do Not Disturb mode is enabled, you can use it at anytime by pressing the keystroke combination you set in the above steps.
When Do Not Disturb mode is on (the Notification Center icon in the menu bar is dimmed), all notifications and alerts will not show up, but they will still be contained within the Notification Center.
When Do not Disturb mode is off, all alerts and notifications will come through to the Mac as usual, showing up as pop-up alerts in the upper right corner of the screen.
macOS Mojave includes a shortcut for ending a sentence with a full stop by just pressing the space bar twice. This means that hitting the spacebar twice will insert a period and a space automatically at the end of a sentence (or a word).
Automatically typing periods comes to the Mac from the iPhone and iPad world. To enable this feature:
• Go to the Apple menu and choose "System Preferences"
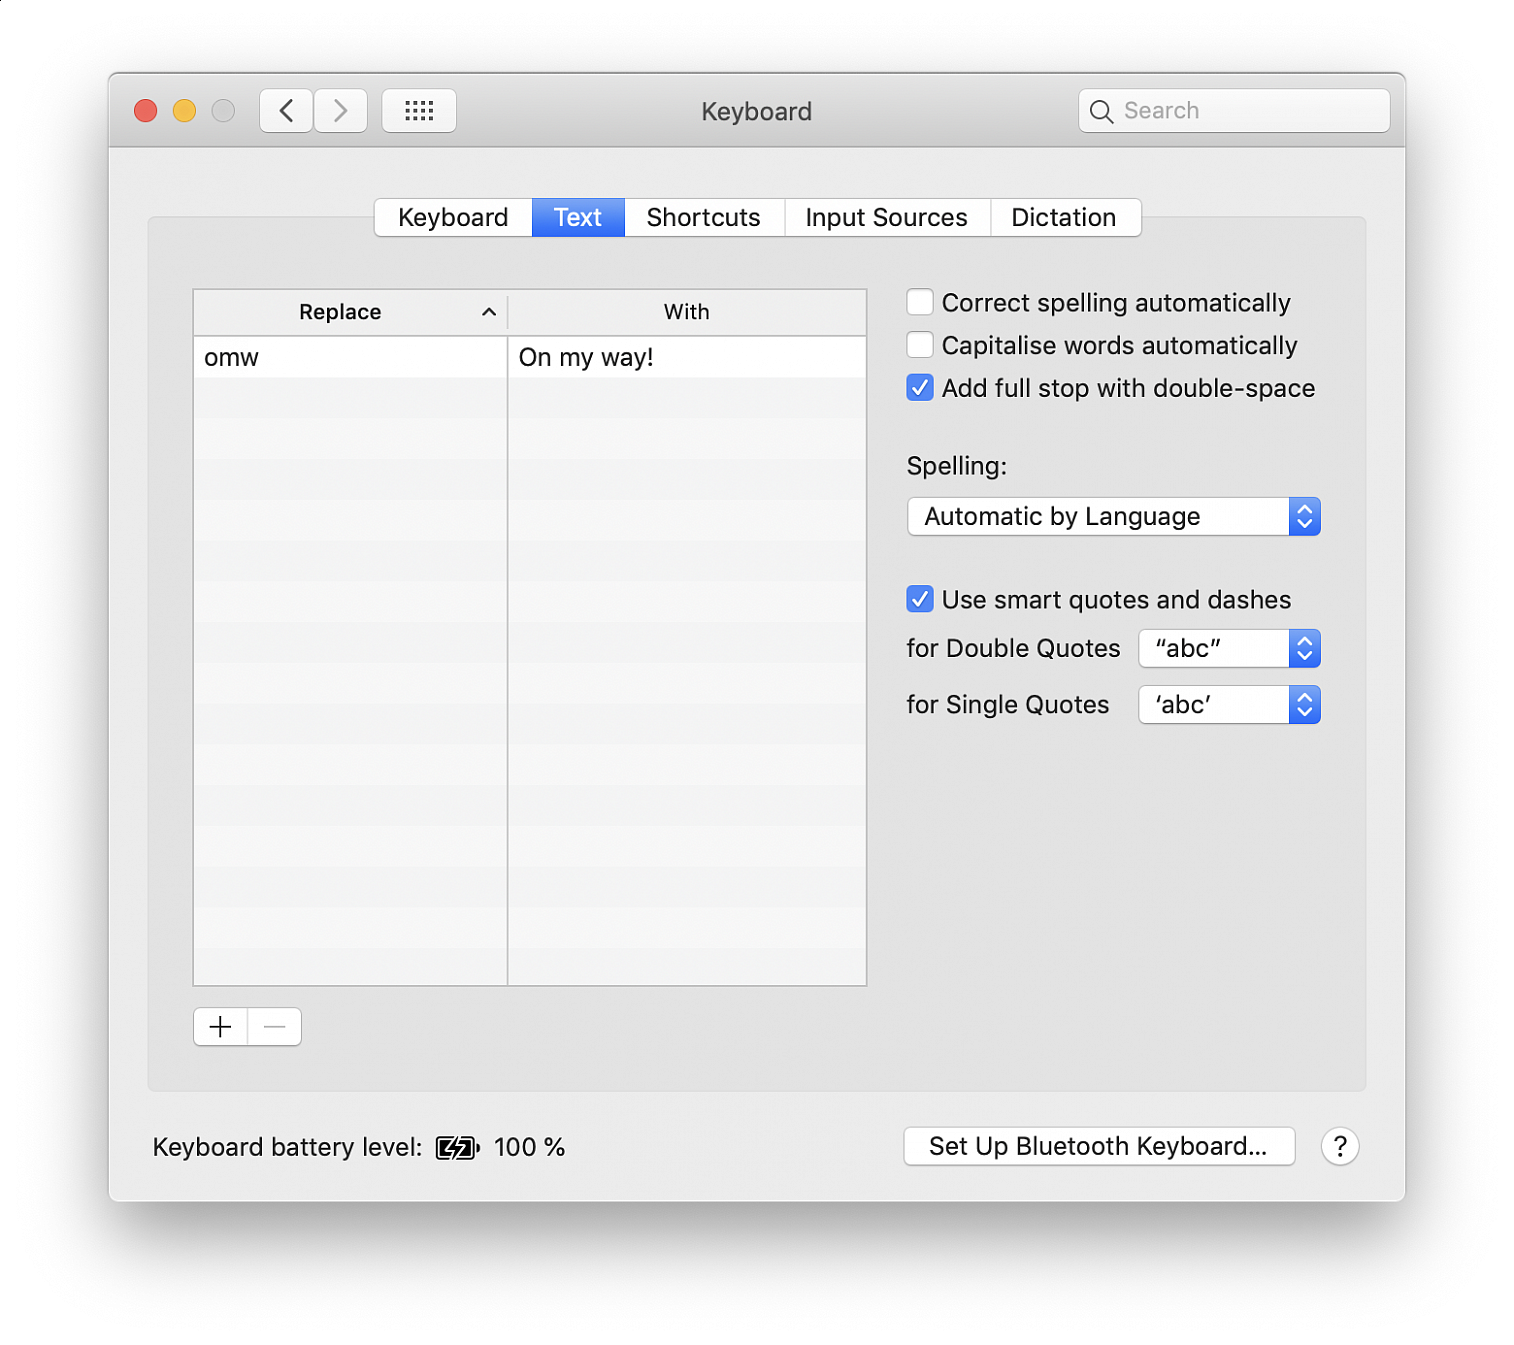
• Select the “Keyboard” preference panel, then choose the “Text” tab
• Locate the setting for “Add full stop with double-space” and toggle the checkbox to the "On" position
• Exit System Preferences
Now when you hit the space bar twice, a period and a space will be inserted automatically.
Wireless interference can cause Wi-Fi and Bluetooth devices to disconnect or perform poorly. Bluetooth enabled keyboards and mice may not pair or connect consistently, or audio from Bluetooth enabled earphones or speakers may be choppy, but you can take steps to reduce or overcome it.
Any of these symptoms could be caused by interference affecting the Wi-Fi or Bluetooth signal:
• Device doesn't connect or stay connected
• Connection is slow and signal strength is low
• Bluetooth audio skips, stutters, cuts off, or has static or buzzing
• Pointer movement is erratic or jumpy
These general steps can help achieve a cleaner, stronger wireless signal:
• Bring your Wi-Fi device and Wi-Fi router closer together. Bring the Bluetooth devices that are connecting to each other closer together.
• Avoid using your wireless devices near common sources of interference, such as power cables, microwave ovens, fluorescent lights, wireless video cameras, and cordless phones.
• Reduce the number of active devices that use the same wireless frequency band. Both Bluetooth and Wi-Fi devices use the 2.4 GHz band, but many Wi-Fi devices can use the 5 GHz band instead. If your Wi-Fi router supports both bands, it might help to connect more of your Wi-Fi devices to the 5GHz band. Some dual-band routers manage this for you automatically.
• Configure your Wi-Fi router to use a different Wi-Fi channel, or have it scan for the channel with the least interference. Most routers perform this scan automatically on startup or when reset.
If you're using USB 3 devices with your computer, you can limit their potential to interfere with nearby wireless devices:
• Use a high-quality, shielded USB cable with each USB 3 device.
• Move your USB 3 devices—including any USB hubs—farther away from your wireless devices.
• Connect USB 3 devices to the ports farthest from your computer's Wi-Fi antenna. For example, if your computer has ports on the back, prefer the USB ports closest to the middle. If your computer has ports on the side, prefer the USB ports closest to the front.
• Turn off any USB 3 devices that aren't in use.
Avoid physical obstructions in the path of your wireless signal. For example, a metal surface between your Bluetooth mouse and computer could cause the mouse to perform poorly, and a metal-reinforced concrete floor between your Wi-Fi router and Wi-Fi device could cause poor Wi-Fi performance.
• Low interference potential: wood, glass, and many synthetic materials
• Medium interference potential: water, bricks, marble
• High interference potential: plaster, concrete, bulletproof glass
• Very high interference potential: metal
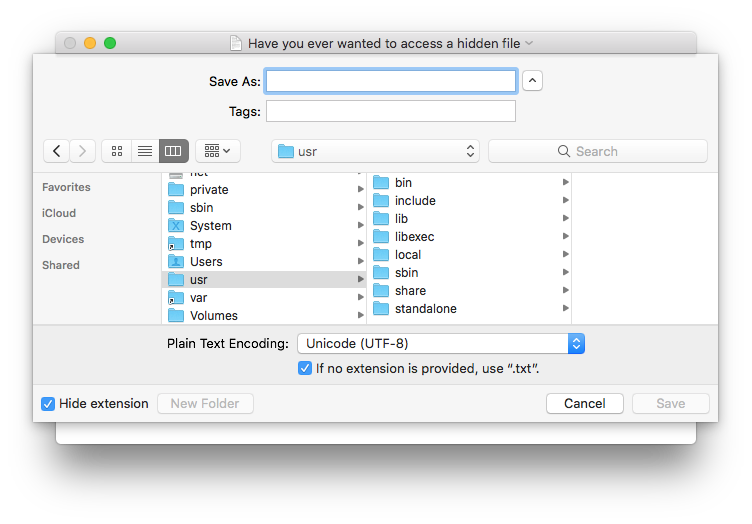
You can easily toggle hidden files by hitting Command+Shift+Period in any dialog window.
The "Save As..." keyboard shortcut allows you to quickly save a new version of an active document without re-writing the currently active document, which is perfect for many productivity situations where you'd want to save a current file as a different file type for compatibility reasons or as a backup version, or as a different copy in a new location.
"Save As..." used to be a default option in the File menu but now it's hidden by default. Not to worry, with a simple keyboard app shortcut you can regain the uber convenient "Save As..." option in the File menu.
• Open the Apple menu and choose "System Preferences"
• Select "Keyboard" and then choose the "Shortcuts" tab
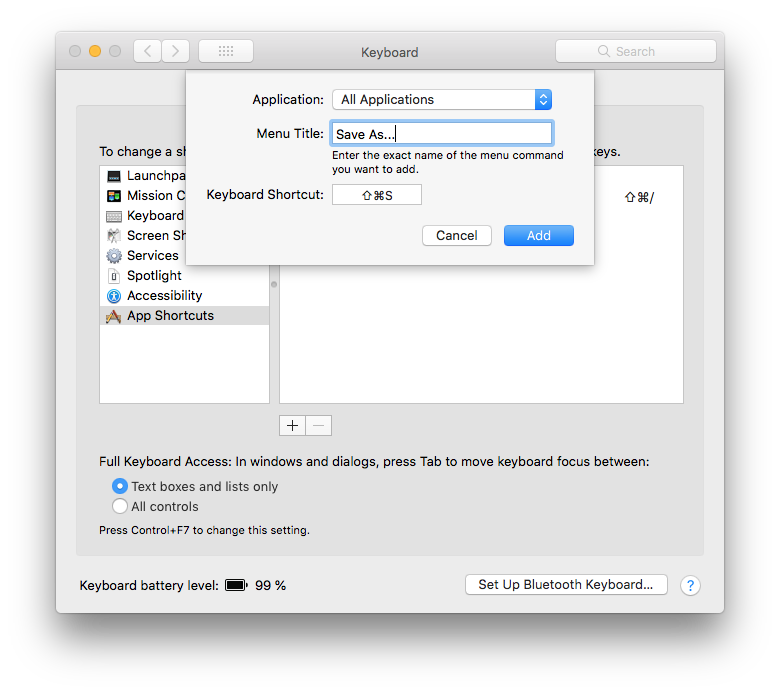
• Select "App Shortcuts" then press the + plus button to create a new shortcut for All Applications
• Set the following for the keyboard shortcut:
Application: All Applications
Menu Title: "Save As…"
Keyboard Shortcut: click into the field, then press Command + Shift + S
• Click "Add" to finish adding the "Save As..." keyboard shortcut and close out of System Preferences
The "Save As..." will now appear by default in the File menu of apps, and be available instantly as the Command + Shift + S keyboard shortcut. You can test this out yourself by going to any app that supports file saving and you'll find the File menu now includes the "Save As..." option by default, along with the keyboard shortcut.
The modern macOS default keyboard shortcut for "Save As..." is the finger twisting combo of Command + Option + Shift + S. All we're doing in this particular App Shortcut is to remap that complex keystroke into the familiar and easier to manage Command + Shift + S keystroke, which was the default in Mac OS for much of Mac history. This change may not be for everyone, but if you're a fan of using "Save As...", you'll undoubtedly appreciate knowing that you can get this great file saving feature back with a simple effort.