This is particularly helpful if you use a third-party password manager or prefer managing your login credentials manually.
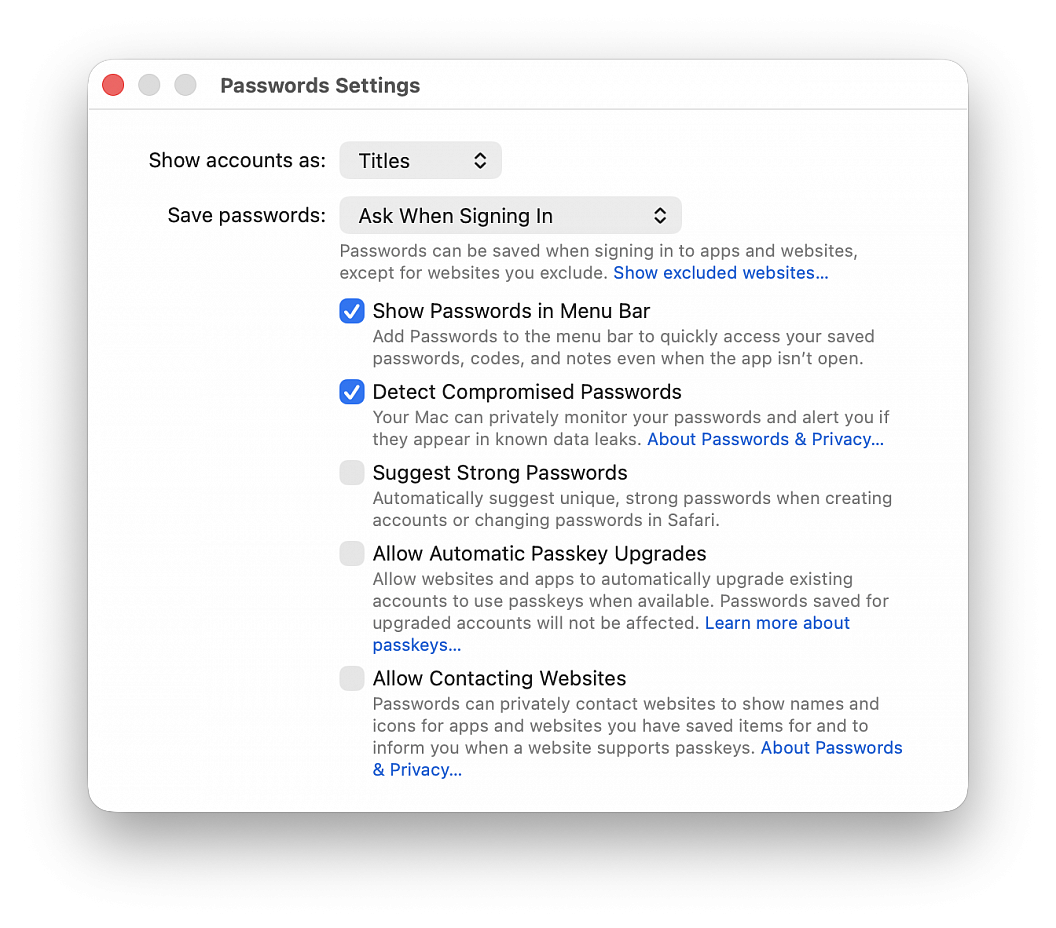
• Open the Passwords app
• Choose Passwords > Settings in the top menu bar, then authenticate with Touch ID or your computer password
• Uncheck Suggest Strong Password
You’ll no longer get suggestions in Safari to create a new password (and save it to the Passwords app) when you’re signing up for a new account on a website or changing the password of an existing website. But you should still see a tiny key icon in the password field, which you can click to generate a new password. If you don’t want to see even the tiny key icon in the password field to use the Passwords app, go to Safari settings > AutoFill and uncheck the box for "User names and passwords".
If you are going to sell, return, or give away a Mac, you almost certainly want to factory reset the computer first. Performing a factory reset on a Mac will erase all data on the Mac, and return it to a clean slate as if the computer were brand new, without any data or personal files on the computer at all.
Erasing a Mac and returning it to factory defaults has never been easier, thanks to the addition of a “Erase All Content & Settings” feature introduced in newer versions of macOS system software. Gone are the days where you had to manually erase and then reinstall system software, now you can simply let MacOS handle the task for you by choosing to erase and factory reset the Mac through a handy built-in feature.
The approach is available in macOS Ventura and newer only.
Be sure to back up the Mac with Time Machine first! Proceeding will erase all data, files, and information from the computer. This will erase all data on the Mac. Do not proceed unless you have backups of your data. Failure to backup will result in permanent data loss!
• Pull down the Apple menu and go to “System Settings...“
• Go to “General“
• Choose “Transfer or Reset”
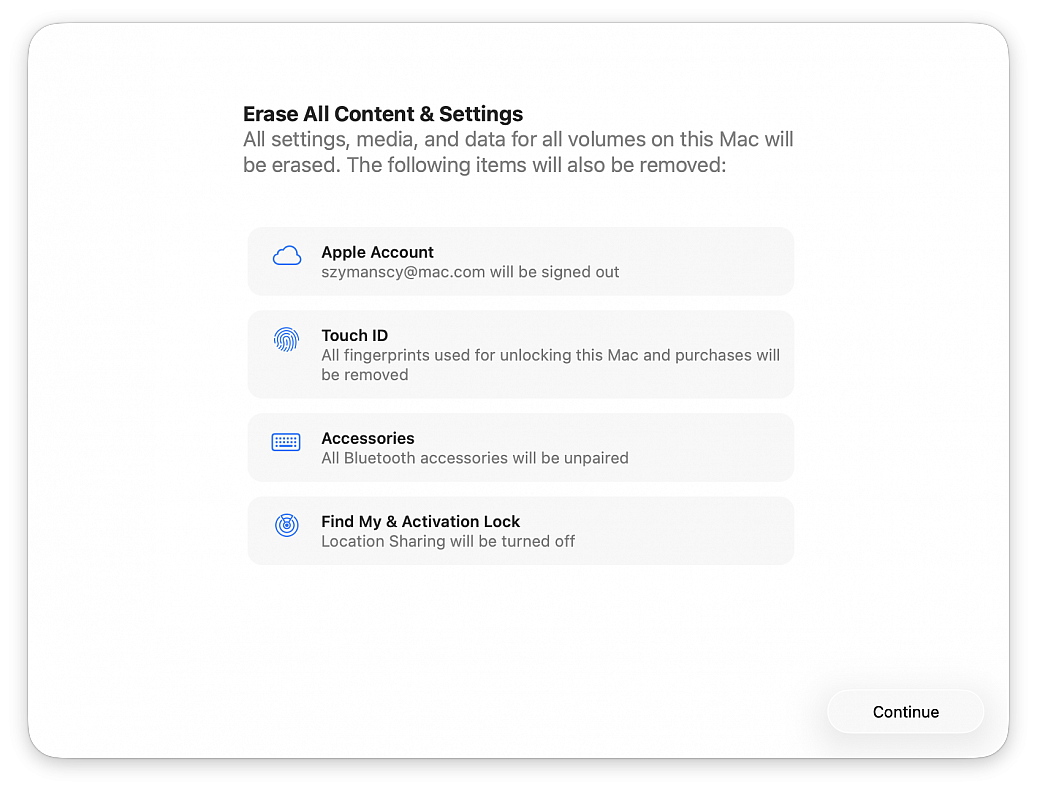
• Click on “Erase All Content and Settings”
• Confirm that you want to erase everything, log out of your Apple ID, and remove all data from the Mac by clicking “Continue”
• Follow the onscreen instructions to complete the process
When the Mac has finished factory resetting and erasing everything, a freshly installed version of the current version of macOS will boot into the typical “Hello” screen. Assuming you’re going to be gifting this Mac or selling it, you probably do not want to set it up yourself, instead let the recipient handle it.
This same factory reset feature also exists in macOS Monterey, but it is accessed slightly differently on those Macs. To factory reset a macOS Monterey Mac, go to the Apple menu > System Preferences > System Preferences menu > Erase All Content And Settings. Be sure to backup all data beforehand, as usual.
Images of tax, banking or wire transfer forms containing sensitive information can easily be viewed by anyone with physical or remote access to your machine. Unfortunately, macOS Preview doesn’t support file-level password protection, but there is a quick workaround that don't require third-party software.
By converting your graphics file to a PDF, you can unlock a handy password feature tucked away in its settings, turning your image into an encrypted password-protected PDF. This takes just a few seconds.
• Right-click the image you want to password protect, hover over “Open With,” and choose Preview
• Go to File > Export...
• Name your file, choose its location on your machine, choose PDF as format and click "Permissions..." to give you more options, including the one to add a password to the file
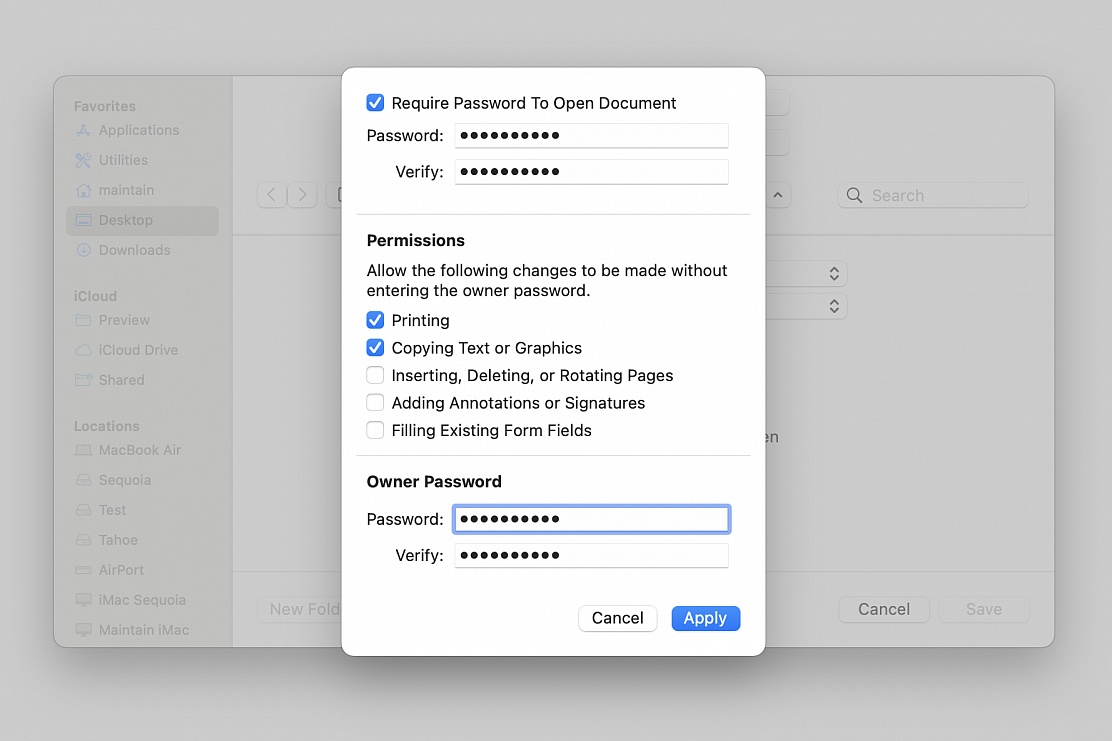
• Check the “Require Password To Open Document” box
• Enter the password
• Set permissions to allow actions and/or changes to be made without entering the "Owner Password"
• Enter the "Owner Password" required to allow any actions and/or changes not selected in the Permissions section
• Click on “Apply” and then click “Save”
Here are three useful tips that will ensure you do not face this issue on your Mac.
Add a password hint
After you add a password hint, it shows up on the screen if you enter the incorrect password a few times. You can see that hint and instantly recall what your Mac’s login password is.
A hint should be there to help you refresh your memory. Do not put your exact password or make it too obvious that others around you can guess it.
You can add the hint when you’re creating or changing your Mac’s user account password. Here’s what to do if you’d like to add one now:
• Go to Apple menu > System Settings... > Users & Groups
• Click the info icon (i) next to the desired account
• Click Change... next to Password
• Create a new password and add the hint on this screen
• Lastly, click Change Password
Once the hint is added, go to System Settings > Lock Screen and turn on the switch for “Show password hints”.
Show a Lock Screen message
The Lock Screen message is not for adding password hints but rather for displaying a welcome message. You can for example add your email address/phone number so someone who finds your misplaced Mac can contact you and return it.
However, if you do not want to change your current Mac password – a requisite for adding password hint if you don’t have already – then you can rely on the Lock Screen message feature to add a hint. But again, don’t make it obvious.
• Launch Cocktail (https://www.maintain.se/cocktail)
• Click the Interface toolbar button
• Go to the Login tab
• Enter your message into the "Display additional message" text field
• Click Apply
Allow Apple ID to reset Mac’s password
This is an extremely important step that will be helpful if you’ve forgotten your password and can’t figure it out even after looking at the hint.
Go to System Settings > Users & Groups and click the info icon (i) next to an account. Now, turn the switch for “Allow user to reset password using Apple Account”
From now on, you can use your Apple ID and password to reset your Mac’s forgotten account password.

Using removable media, such as USB flash drives or removable disks, is a convenient way to transport information. However, if the removable media is lost or stolen, someone else can access its data by mounting the media on another computer.
If you want to keep private or confidential information secure on removable media, you need to encrypt the information on it.
WARNING: When you encrypt a disk or other media, the disk format is converted to the APFS format and then encrypted. Macs with earlier versions of macOS that don’t support the APFS format are not able to read the device’s data. Consider whether you need to connect the media to a Mac with an earlier version of macOS before you encrypt the data. You can also update your other Mac to the latest version of the macOS that supports the APFS format.
To protect your removable media with encryption:
• On your Mac, click the Finder icon in the Dock to open a Finder window
• In the sidebar, Control-click the item you want to encrypt
• Choose Encrypt [item name] from the shortcut menu
• Create a password for the disk and click Encrypt Disk
Be sure to record and keep this password in a safe place. You cannot access the data on the encrypted disk without it.
It may take some time to encrypt, depending on how much information is stored on your Mac. However, you can use your Mac as usual while the disk is being encrypted. To decrypt an encrypted disk, Control-click the disk you want to decrypt, then choose Decrypt [item name] from the shortcut menu.