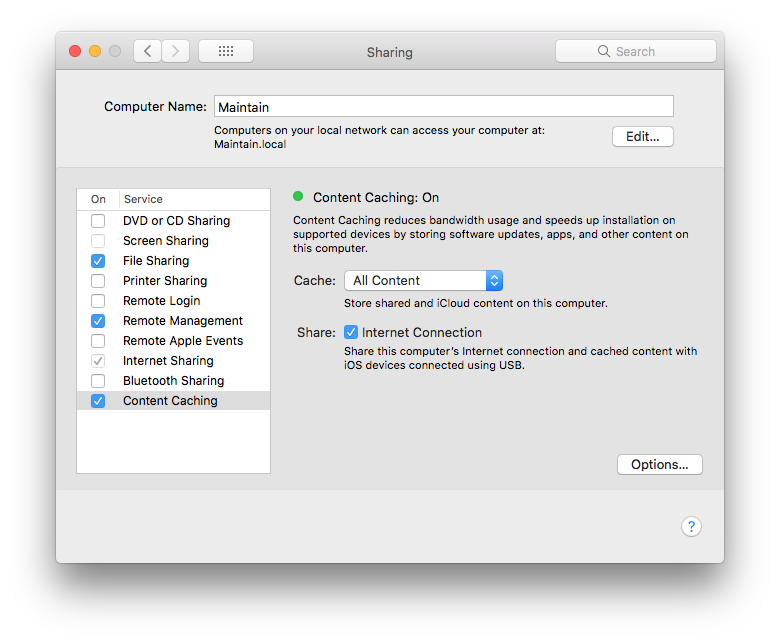
Content caching is a new feature available in macOS High Sierra. Content caching reduces bandwidth usage and speeds up installation on supported devices by storing software updates, apps, and other content on local computer.
Content caching is a great idea, especially if you have an always-on (or often-on) Mac in your home or office. Instead of having to download the same stuff over and over, you only do it once. Then, any other devices on your network pull their data from your Mac, instead of from Apple's servers. That's probably a boon for Apple's data bills, but for us it could make a huge difference to update speeds. When this feature is switched on, both Mac and iOS content is saved locally.
How to set up content caching in macOS High Sierra?
• Open Sharing from System Preferences.
• Unlock the pane. Click the padlock icon in the lower-left and authenticate.
• Configure the Content Caching service.
Shared content: store apps and software updates.
iCloud content: store iCloud data, such as photos and documents.
Share Internet connection: share this computer's Internet connection and cached content with iOS devices connected using USB.
• Switch it on. Click the checkbox on the left of the service name to enable it.
Keep in mind that content caching will download all content requested by any client device, so the service will consume vast quantities of storage space unless you limit the storage. You can inspect how much storage space is being used on your Mac by the caching service by clicking the Options button. You can also use Cocktail (Preferences > Caches > System > Content caches) to flush/clear content caches.
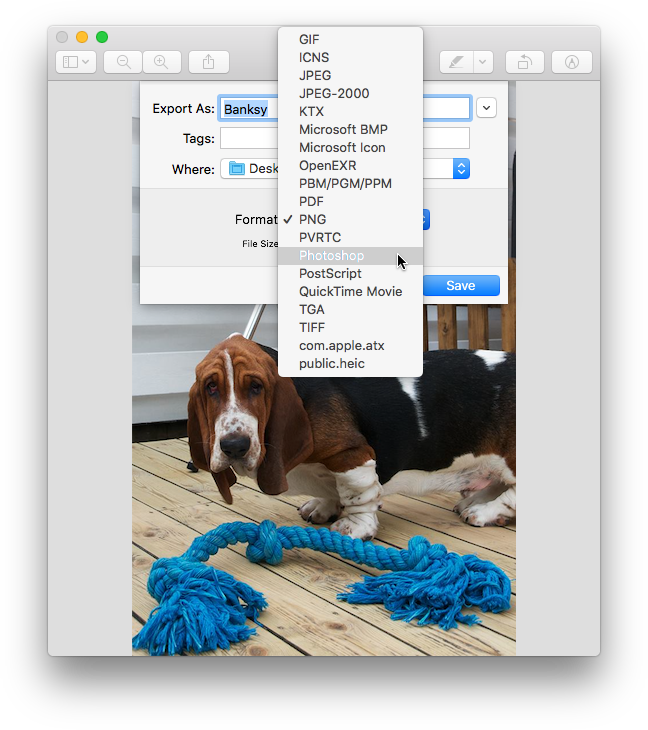
Preview is a great basic image editing application bundled with macOS, but recent versions have simplified the available image export format options down to JPEG, JPEG 2000, OpenEXR, PDF, PNG and TIFF. Or at least that's what you see on first glance.
It turns out you can still access all the traditional image format options from the Save and Export panels just by holding down the Option (Alt) key when clicking on the Format menu.
Holding the Option (Alt) key when selecting format reveals all possible image formats. You can use this to convert existing images to different formats, or to save the file as a less common format.
macOS High Sierra contains many new features and capabilities, but APFS (Apple File System) is certainly one of the biggest changes. Changing the primary file system used by the Mac is a big deal. And like any big deal, there’s a lot to understand about how APFS will work with existing Mac apps and services, including Time Machine.
In its current incarnation, the Time Machine app is mostly compatible with APFS; that is, you can back up an APFS formatted drive using Time Machine, as well as restore files from a Time Machine backup to an APFS formatted drive. However, there are some very important caveats that Time Machine users should be aware of.
Time Machine drives must be formatted in HFS+ (a file system released with Mac OS 8.1 in 1998 and found on every version of macOS since then). Time Machine uses the magic of hard links, a feature that HFS+ file systems have to catalog and keep track of which files in a backup make up the current version of an app, document, or directory.
APFS, on the other hand, does not support hard links. When you convert an HFS+ formatted volume to APFS, any hard links found during the conversion process are automatically changed to symbolic links, thus breaking your Time Machine backup into a collection of almost useless files.
Luckily, installing macOS High Sierra won’t automatically convert Time Machine drives to APFS, but it’s possible to accidentally change the drive’s format to APFS from within Disk Utility. You’d think Disk Utility would detect the Time Machine backup and stop you, but it doesn’t. You can also convert a drive to APFS without macOS warning if you use the Finder option to encrypt a drive in High Sierra (macOS will convert the format to APFS before encrypting the drive).
If you do accidentally convert a Time Machine drive to APFS, the Time Machine app will no longer recognize the drive as a backup drive. If you select the old Time Machine drive within the Time Machine app as a backup destination, you’ll be confronted with an option to erase all of the content on the selected drive and reformat it as HFS+.
Until Apple releases a new version of Time Machine that makes use of the APFS feature set, such as snapshots to replace file linking, your Time Machine backup must remain formatted as HFS+.
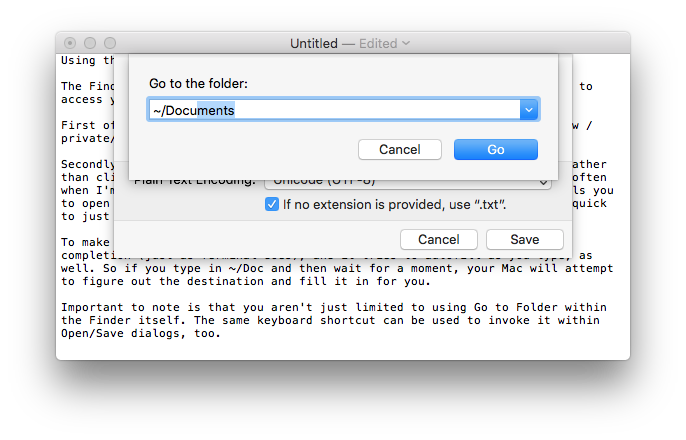
The Finder's Go > "Go to Folder..." (Shift-Command-G) menu item is a nifty way to access your file system.
First of all, you can use it to see hidden folders, so if you need to view /private/var, you don't have to open a Terminal window to do so.
Secondly, the "Go to Folder" window is an excellent place to paste a path rather than clicking around to get to a deeply nested folder. I use this pretty often when I'm troubleshooting. After all, if Apple's support documentation tells you to open ~/Library/Mail/V2/MailData to access a file within it, it's very quick to just copy that path and paste it into the window.
To make typing stuff in even faster, the "Go to Folder" window allows tab completion (just as Terminal does), and it tries to autofill as you type, as well. So if you type in ~/Doc and then wait for a moment, your Mac will attempt to figure out the destination and fill it in for you.
Important to note is that you aren't just limited to using "Go to Folder" within the Finder itself. The same keyboard shortcut can be used to invoke it within Open/Save dialogs, too.
You can use these keyboard shortcuts to shut down or restart Macs that have a keyboard with an Eject key. If you have a computer without an Eject key, simply replace the Eject key with the Power Button in the tips below.
Please note that key names are separated by a hyphen (-), such as "Control-Eject". You do not type the hyphen as part of the key combination.
Control-Eject
The dialog box "Are you sure you want to shut down your computer now?" appears with options to Restart, Sleep, Cancel or Shut Down. After the dialog appears, press the R key to Restart, press the S key to Sleep, press the Esc key to Cancel, or press the Return key to Shut Down.
Control-Command-Eject
Quits all applications (after giving you a chance to save changes to open documents) and restarts the computer.
Control-Option(Alt)-Command-Eject
Quits all applications (after giving you a chance to save changes to open documents) and shuts the computer down.
Command-Option(Alt)-Eject
Puts the computer to sleep.
Shift-Control-Eject
Puts all displays to sleep.
Power Button (if the computer is not responding)
Press and hold the power button on the computer for six seconds to shut down the computer.