If you’re the kind of Mac user who personalizes their computer a lot, you may also be interested in changing the way Siri sounds when she replies to your voice commands. This is something that wasn’t possible until recently.
Ever since the release of macOS Big Sur 11.3 software update Apple is giving users multiple voice options for Siri. Now you have a total of four different voice options that change how Siri sounds without affecting the accent. Two of them are masculine deeper voices whereas the other two are feminine higher pitched voices, though the voices are plainly labeled as Voice 1, Voice 2, Voice 3, and Voice 4, without any gender suggested or implied.
Before you get started with the following procedure, make sure your Mac is running at least macOS Big Sur 11.3 or later, since the new voice options aren’t available on older versions. Once you’re done, follow these steps.
• Head over to System Preferences on your Mac from the Dock. Alternatively, you can click on the Apple menu and choose “System Preferences” from the dropdown menu. This will launch a new window on your screen. Here, click on the Siri option which is located in the first row.
• Now, you’ll see that the older voice selection has been changed to “Voice Variety”. Right below, you’ll see the new Siri Voice setting with four different voices to choose from. Check out all of them and select the one that you prefer.
Did you know that your Mac has hidden fonts that are disabled by default? If your Mac is running macOS Big Sur, Catalina, or later, you can access all these hidden fonts and install them for free.
It turns out that Apple obtained licenses for a slew of new fonts in macOS that can be used system-wide, but these fonts aren’t installed on the Mac by default. Instead, these are an optional download and you might not necessarily be aware of this. Since these fonts can be used system-wide, you’ll get to use them in the documents or projects that you’re working on, for a unique look.
Before you get started with the following procedure, make sure that your Mac is running macOS Catalina or later, since these fonts aren’t accessible on Mojave and older versions.
• Click on the “magnifying glass” icon located at the top-right corner of your desktop to access Spotlight search. Alternatively, you can open Spotlight by pressing Command + Space bar.
• Next, type “Font Book” in the search field and open the app from the search results.
• Now, head over to the “All Fonts” section in Font Book, and scroll down to view all the available fonts.
• The fonts that are grayed out in this list are the hidden fonts that Apple recently added to macOS. Clicking on the fonts will give you a preview of what it looks like. To install these fonts, right-click on the font and choose the download option as shown in the screenshot below.
• When you’re prompted to confirm, click “Download”. Once the download completes, the font won’t be grayed out anymore and you’ll be able to use it in your favorite apps.
That’s about it, you can repeat the steps to install all the hidden fonts you want on your macOS machine.
Unfortunately, there’s no easy way to install all the hidden fonts on your Mac at once. You’ll have to do it one by one which could be a tedious process for many, but on the plus side you’ll get to preview each font before installing it, and you have the option to install just the fonts you actually want to use.
From now on, you can make your Pages documents, Keynote presentations, and Motion projects stand out with these new additional fonts that most people aren’t aware of.
If you're having persistent networking issues on a Mac, like constantly dropping from a Wi-Fi network, inability to join networks, inappropriately sluggish internet connections that only impact the particular Mac, or other networking related issues, it may be helpful to reset the network settings.
The easiest way to reset Wi-Fi settings is to delete Wi-Fi related configuration files. Please note that by resetting network settings you will need to re-add and re-join any networks and enter the passwords again.
• Disable Wi-Fi by pulling down the Wi-Fi menu and choosing to toggle the Wi-Fi switch Off
• Go to the Finder, pull down the "Go" menu, choose "Go to Folder..." and enter the following path:
/Library/Preferences/SystemConfiguration/
the click the "Go" button
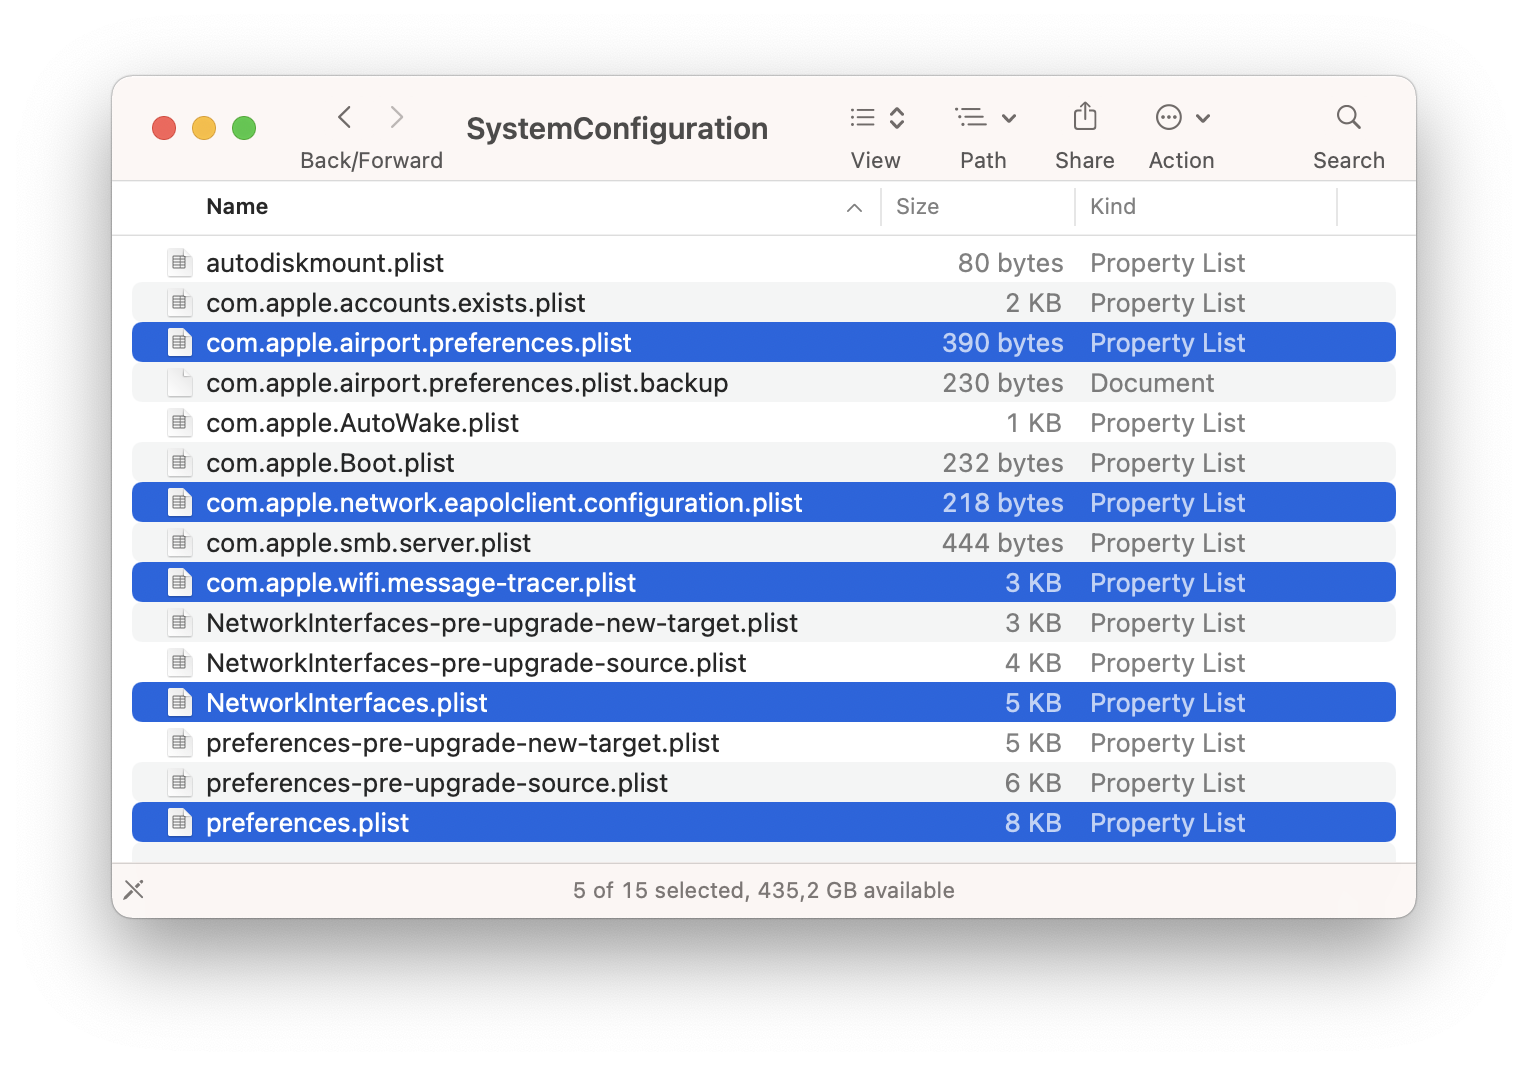
• Select and delete the following files from this folder:
com.apple.airport.preferences.plist
com.apple.network.identification.plist
com.apple.wifi.message-tracer.plist
com.apple.network.eapolclient.configuration.plist
NetworkInterfaces.plist
preferences.plist
• Restart the Mac by going to the Apple () menu and choosing "Restart..."
• When the Mac boots back up, enable Wi-Fi again by going to the Wi-Fi menu and toggling it back On
• Select the network you wish to join
This approach will often resolve many wireless networking issues encountered on the Mac, but if you're still experiencing any Wi-Fi networking issues, you might want to reset the router and the modem itself, which typically involves unplugging those devices from power source for 10-15 seconds and then plugging them back in again, then waiting a few minutes for those to rejoin the appropriate networks.
Many apps automatically save versions of documents as you work on them. Apple offers a built-in feature for its document-focused apps, like Pages and Numbers, and a framework that some other developers tie into as well. It resembles Time Machine, but doesn’t require that you are using a Time Machine backup.
A version is saved automatically every hour, or more frequently when you’re making many changes, when you open, save, duplicate, lock, rename, or revert a document. You can also explicitly save a version.
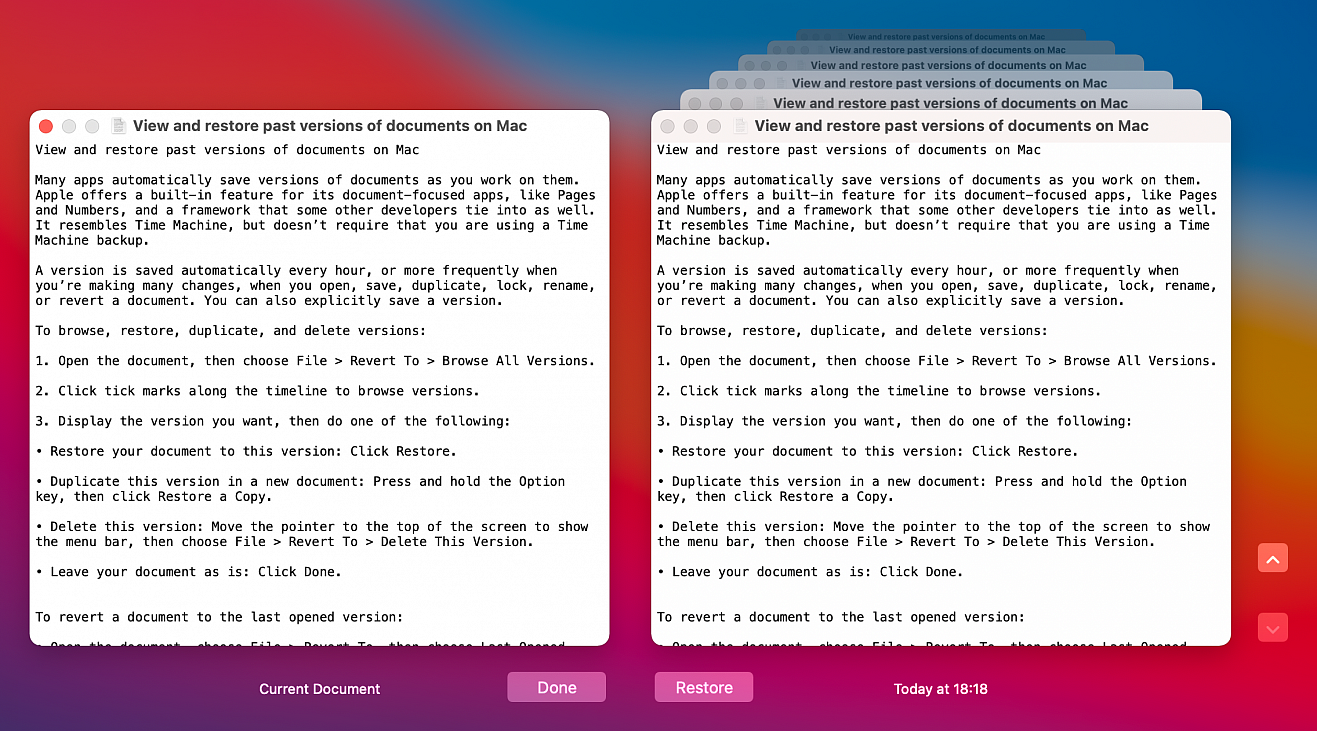
To browse, restore, duplicate, and delete versions:
- Open the document, then choose File > Revert To > Browse All Versions.
- Click tick marks along the timeline to browse versions.
- Display the version you want, then do one of the following:
- Restore your document to this version: Click Restore.
- Duplicate this version in a new document: Press and hold the Option key, then click Restore a Copy.
- Delete this version: Move the pointer to the top of the screen to show the menu bar, then choose File > Revert To > Delete This Version.
- Leave your document as is: Click Done.
To revert a document to the last opened version:
- Open the document, choose File > Revert To, then choose Last Opened, Last Saved, or Previous Save.
To explicitly save a version:
- Open the document, then choose File > Save. To save the document using a different filename, location, or format, press and hold the Option key, then choose File > Save As.
Your Mac is pretty safe on your private home network, but what about when you're surfing the Web in coffee shops? Anyone with a computer and rudimentary hacking skills could target you, which is why it's important to make sure your Mac's built-in firewall is enabled and that stealth mode is turned on.
macOS's firewall feature blocks unwanted network traffic coming into your computer, and stealth mode makes your Mac essentially invisible to hackers snooping for computers to target. They aren't foolproof features, but they will keep most people from finding and attacking your Mac on public networks.
First, you need to make sure your Mac's firewall is enabled:
• Go to Apple menu > System Preferences.
• Choose Security & Privacy.
• Select the Firewall tab.
• If the firewall is active you’ll see a green dot and "Firewall: On." If not, click Turn Firewall On. You may have to click the padlock icon and authenticate with your Mac's password to change the setting.
Next, enable stealth mode:
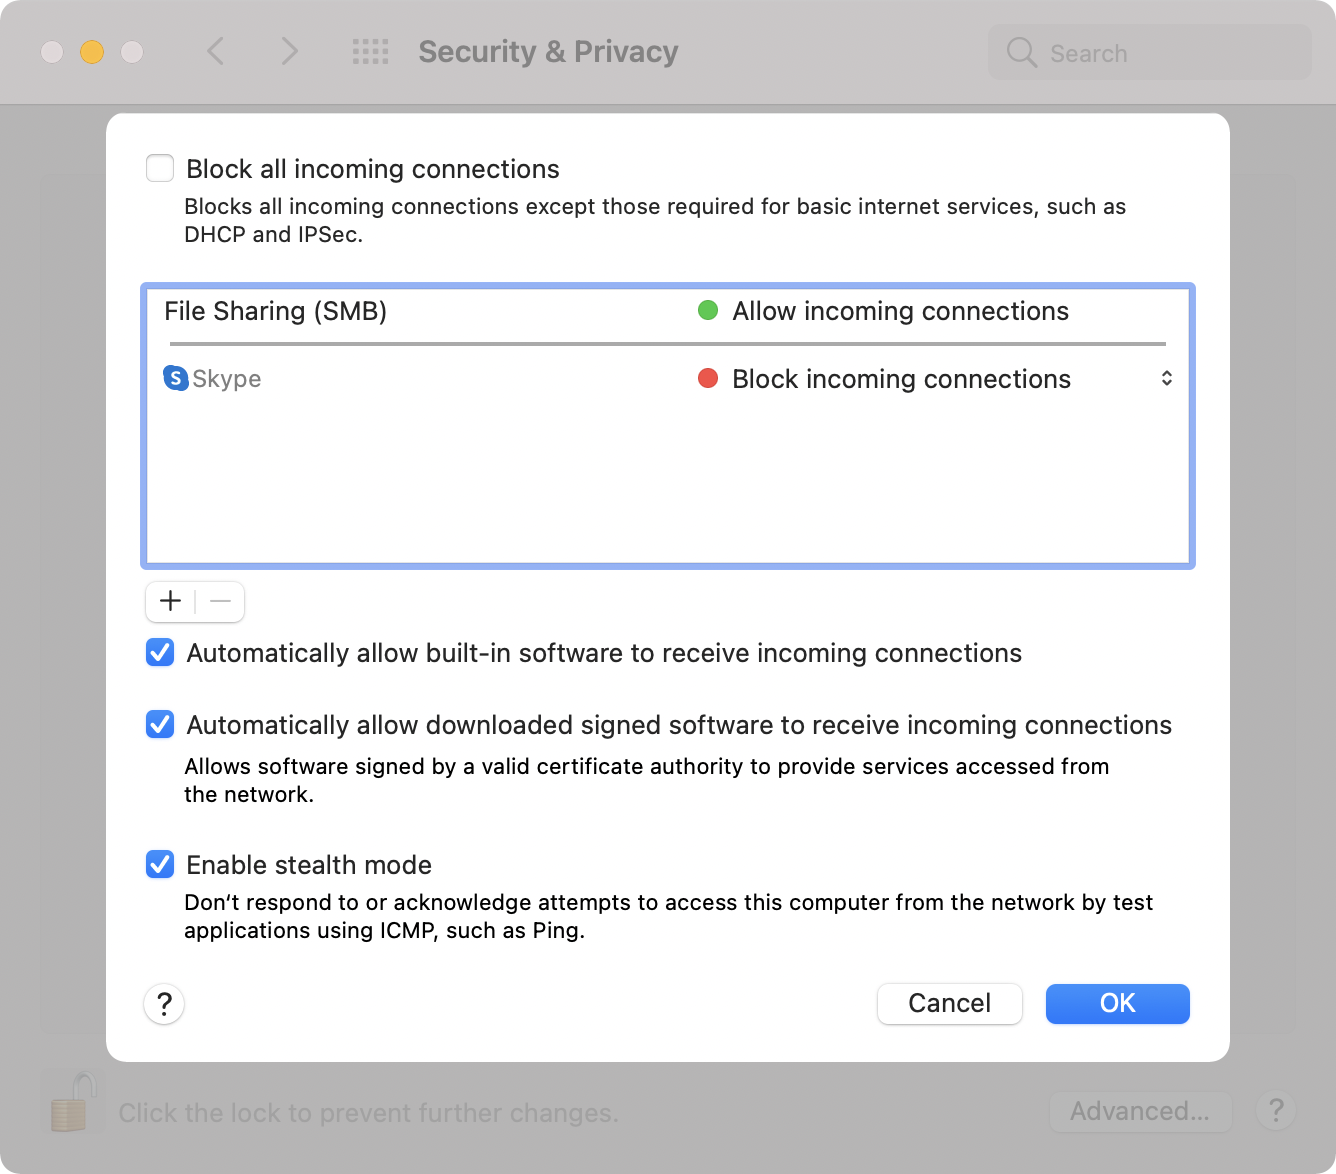
• Click Firewall Options. It's below the button for turning the firewall on and off.
• Check Enable stealth mode.
• Click OK.
"Automatically allow built-in software to receive incoming connections" and "Automatically allow downloaded signed software to receive incoming connections" should already be checked. Those settings let the apps you already have communicate through the firewall without you having to take any extra steps. Leave those checked unless you know what you're doing and plan to manage app network access manually. You should leave "Block all incoming connections" unchecked too, unless all you're doing is surfing the Web.